 with Jim Bova Project #2 Returns! Front Spring Over With Rear Springs
With the rear SPOA done on #2 it was time to move on to the front. There is a little more work involved in the front with the steering. There are a few ways to address the steering issue, cross over steering , Z-link, or using Mercedes arms. I opted for the Z-link at this time, the least desirable, but cheapest for now. It is said to cause bump steer which comes from mis-alignment of the steering and pitman but on a rarely street used rig it should be OK for now.  Looking a little uneven at this point
  In this pic you can see the bolt on shackle reversal that is to be replaced.
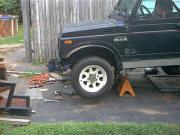
  You can never be too safe or have too many jacks. Because the frame and the axle housing will have to both be moved, I had to place jacks and jackstands to keep it stable
  View from the side with the old springs remove
  Another view from a different angle. Notice the brake line being streched. I am replacing the lines with longer ones and the lines are already drained of fluid.
 I moved the old set of springs in the rear to do the Rears Up Front configuration. I removed the overload from the rear springs and replaced it with the smallest leaf of the front pack. I may have to experiment on getting it level by swapping leaves around.
  Using temporary bolts for the picture. These are not long enough for safe driving!
  For the shock mount I flipped the spring plates over and side to side. Because of the difference in the diameter of the passenger side and the driver side front u-bolts the holes in the plates needed to be machined
  Springs mounted up. You can see the need for longer brake lines already.
  I opted for the RRO spring perches because they weld to the old spring perches. I was told recently that you should also tack them to the axle tubes with care doing the welding. I also heard of a guy who ran them without welding but would not promote that idea up front.
  Top view of the springs mounted on top and the machined and flipped bolt plates and shock mounts. 08/11/10 14:50:34