

 Check the cap for anything that may have made its way in there and replace the cap.
 Here we see the NEW STRETCH BOLTS AND RETAINERS that we talked about earlier. They come from ARB with a locktite compound already applied (photo on the right) The action in this sequence is all at the bottom of the photo. Click through the picture for a closer look. Once the bolts are all torqued down, the retainers are pressed into place with a few taps of a hammer using a small socket to seat it.


 And that is basically it. Reassemble in the reverse order and make sure you take your time to do it right. Rebuilding it on the trail is a royal pain.
But now you have an Air Locker for the front, and you are going to enjoy it!
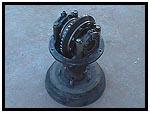
 You may have noticed the stand that we used during this buildup. It was specially constructed to do work on Suzuki differentials. It has a hole drilled out in the center so that you can get to the pinion nut while the flange is bolted to the stand. Both drive shaft bolt patterns are drilled out of the center so that the drive shaft flange can be bolted to the stand for stability. If you want to work on a Sammy diff on your workbench without going to such an extent, you can use a rear brake drum in the same manner. Balance the diff on the drum and use a bolt to hold it in place. Source:
ARB Corporation LimitedAir Locker Inc. 20 South Spokane Street Seattle, WA 98134 Tel: 1-206-264-1669 Email: sales@ARBUSA.com
08/11/2010
[tech/footer.htm]
