 with Todd Dowless
96 S-10 BLAZER SEAT INSTALLATION
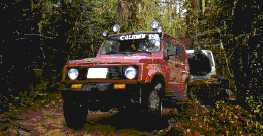
 I have owned my 88.5 Samurai since 89 and my seats have needed replacing for quite a while. About three years ago I bought some Wet Okole Seat Covers and they served their purpose. This time I was looking for something to last longer and be more comfortable than stock seats. So I took some measurements and went to the salvage yards. After a couple of trips I started getting discouraged. My biggest problem was that I didnt want to do a lot of fabricating or cutting, not to mention the fact that I cant weld. (YET)!
My search ended when I least suspected it. I stopped by a body shop that rebuilds wrecked blazers, Z-71s, and so on. The owner had a pair of 96 S-10 Blazer seats out of a four-door that were tan cloth. Since my Samurai is gold, the tan seats seemed to be ideal for my dark brown and tan JX interior. I took some quick measurements and it seemed to good to be true, I had found my seats. They were in excellent shape, had lumbar support, and $100 later they were mine. According to my measurements the only modifications would be drilling some holes. Since my installation, I have seen the same seats in two-door Blazers and S-10 trucks. I have seen the seats in tan and gray, so all Samurai owners should be able to find an interior match.
Now the Install
Parts Needed
- Pair of 96 S-10 Blazer Seats
- 8 x Bolts w/ Nuts and Lock washers
- Drill motor and index
- Hand tools
Step 1 DISASSEMBLY
My S-10 Blazer seats had power controls. I removed them and the slider brackets that were attached, discarding all pieces that were not to be used in the zook.
STEP 2 REMOVAL
Remove your Samurai seats and measure the distance of the 4 bolts from slider to slider where they are attached to the Samurai seat. Next remove the sliders from the passenger and drivers Samurai seat. I discarded the handle and cable that makes the passenger seat slide forward because it could not be used with my seats. Maybe a pair of seats from a two-door Blazer would allow retaining this feature.
STEP 3 MEASURE AND DRILL (PASSENGER SEAT)
Position the Samurai sliders on the Blazer passenger seat. You can reuse the stock holes on the rear mounts of the Samurai slider. Simply position the sliders using your measurements and drill new holes through the metal on the Blazer frame. Install the bolts, nuts and lock washers in the holes drilled. At the front, mark and drill new holes through the Samurai sliders and the Blazer seat. Then bolt the sliders down securely. The passenger seat is complete.
 Passenger Rear Detail Front Mount Detail Front Mount Detail
STEP 4 MEASURE AND DRILL (DRIVER SEAT)
Position the Samurai sliders on the Blazer driver seat using your measurements. Mark and drill four new holes through the Samurai slider and the Blazer metal frame. Next install 4 bolts, nuts and lock washers. The bolts will have to be installed with the head facing out for slider clearance. This is the most time consuming part because you have to push the seat foam down to get the nut and lock washer under the metal frame. Two items I found very helpful were small hands and a very strong telescopic magnet to hold the nut & lock washer under the seat.
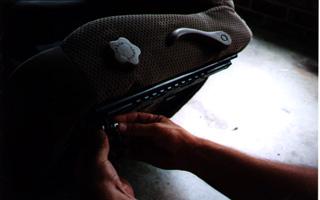
 Samurai Original mounting holes visible Driver seat rear mount detail
**NOTE** I installed the sliders on both seats offset about to the outside edge of the Blazer seat. This prevents the seat adjustment lumbar levers from rubbing the doors.
STEP 5 SEAT INSTALLATION
Simply bolt your seats in as if they were stock seats.

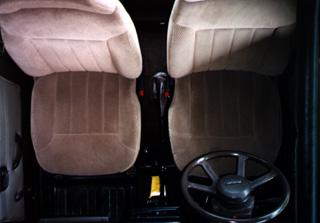
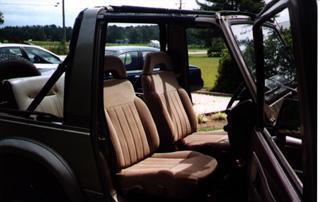 Installed seats Installed Seats
STEP 6 CUSTOMIZING DRIVERS SEAT (OPTIONAL)
Parts Needed
- 2 Roll bar Brackets
- 2 5/16 x Bolts w/ Nylock Nuts 4 Washers
After installing my seats, I decided that I wanted the driver seat a little higher. I removed the bracket at the roll bar attachment and drilled a 5/16 hole through it.
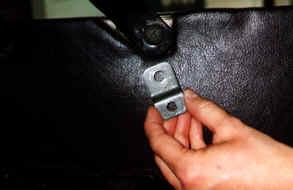
Roll bar bracket with hole drilled
I unbolted the front mounts on the driver seat and installed the end of the bracket with the 5/16 hold through the seat mounting bracket and secured it with a nylock nut. Next I bolted the other end of the bracket to the floor mount using the stock bolt. On the back mounts I installed a couple of washers and bolted it back down.
 Bracket mounting detail Installing bracket
08/11/10 15:21