
with Steve Shoop
Installing A Rocky Road Body Lift On A Tracker
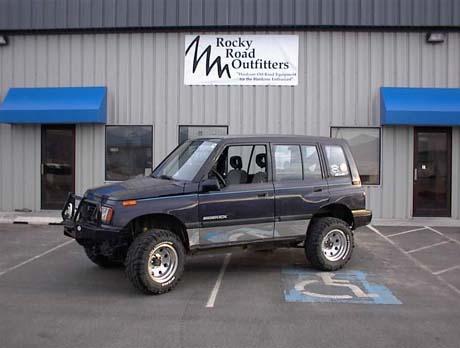 On my 1994 4-Door Sidekick, I already had the Old Man Emu suspension package, as well as the 1 coil spring spacers from Rocky Road Outfitters. I was running 29×10.50 TSL Thornbirds. On the street, all was good, but off-road, I had problems with the rear tires hitting the body with any significant articulation. Rocky Road now offers a 2 body lift for the Sidekick. It sounded like a perfect solution. They also now offer the entire package as the Rock Steady 4.5 Combo Kit.
 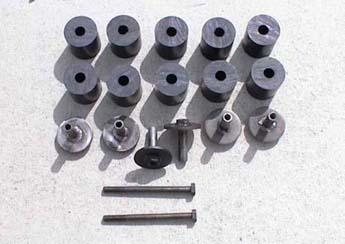 What you need:
- Large & medium Phillips screwdrivers
- Assorted 1/2 metric sockets, driver, and breaker bar
- Good floor jack with wood blocks
- Black RTV Sealant. 2 Pieces of 1 x 4 x 1/8 Steel
- Drill with 1/2 Drill Bit
Installing the lift: Remove grill & headlights to access front body bolts. The grill is held in place by screws hidden in the middle opening, as well as one screw on each side (accessible from the wheel well). The headlights are held in place by four Phillips screws. Disconnect both the headlight and turn signal connectors, and headlight pulls straight out.
Editors Note: Exercise caution when lifting body off the frame. There are the following components which can be stretched to their limit when lifting the body off the frame. 1. Brake line in fenderwell 2. Brake line on pass side inside frame rail 3. Fuel fill hose
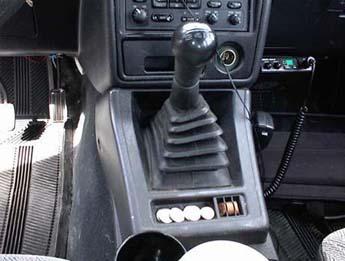 Remove center console and shifter boot(s). The consoles are held in place by screws and plastic fasteners, most of which are hidden under the seat. Be careful removing these, as the console is pretty fragile.
 .jpg) Remove front bumper. The stock bumper is removed with only 4 bolts. Two that were hidden under the grill, and two on the outer sides of the frame rails. I have the ARB Bull Bar, which is held in place with 4 bolts accessed from underneath.
Remove front bumper. The stock bumper is removed with only 4 bolts. Two that were hidden under the grill, and two on the outer sides of the frame rails. I have the ARB Bull Bar, which is held in place with 4 bolts accessed from underneath. 
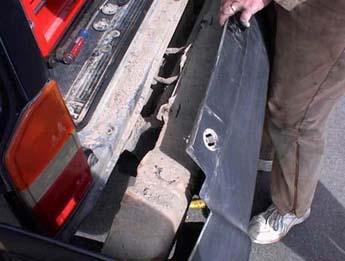
Remove rear bumper. The first step is to remove the plastic outer cover, which has bolts hidden under plastic covers inside the rear gate, as well as bolts on the bottom and in the wheel wells. The inner metal bumper is held in place by three bolts on the top, and 2 bolts underneath.
Remove 8 body bolts/nuts. The front bolts are accessed from the top, and were revealed with the headlights were removed. The remaining six bolts are underneath the body. Mine all came off surprisingly easy for a 100,000 mile car, but you may need some penetrating oil and a large breaker bar. 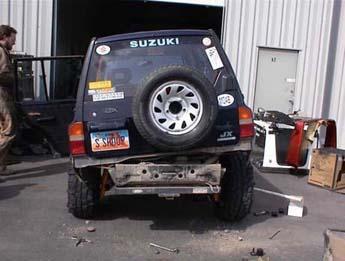
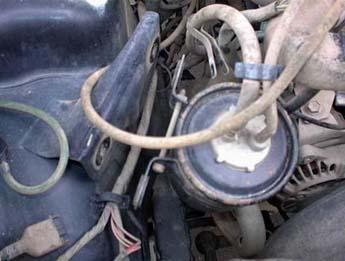
Lift the passenger side of the body with floor jack: Use wood blocks to avoid damaging the bottom of the body, and lift the body about 4 inches off the frame. While lifting, watch carefully for and stretched wires or other clearance problems. I had to disconnect the vacuum canister, as it was catching on the upper radiator hose. 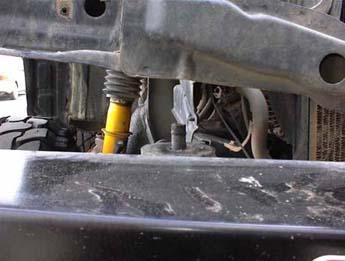 Place an extended body bushing at each body mount (4 per side)
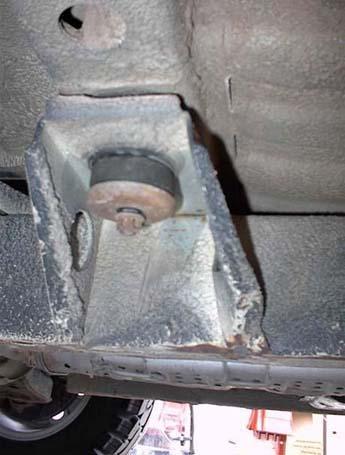
 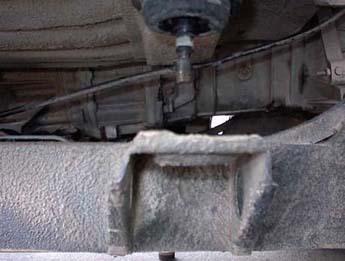 Cement an additional body bushing on the existing body pad between the two mid-body mounts using Black RTV.
 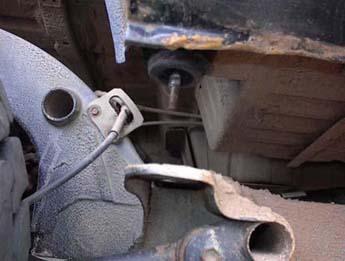 Lower body down onto new bushings: Make sure that the body mount studs stay as centered as possible in the new bushings. You may need to lift the body slightly and coax them into alignment. Remember to reconnect the vacuum canister.
 .jpg) Loosely install new extended body bolts through bottom of frame (all except front).
Loosely install new extended body bolts through bottom of frame (all except front). .jpg) Loosely install new longer front body bolt.
Loosely install new longer front body bolt.
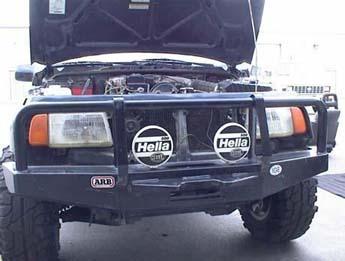
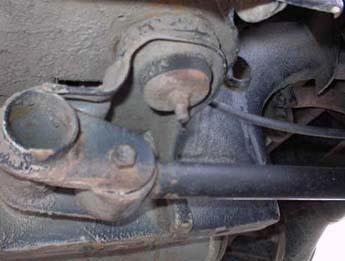
Lift the drivers side of the body, repeat steps 6-11: When lifting the drivers side, I had to cut a wire tie holding wires running to the fuel tank. When installing the drivers side rear bushing, there are wires that could easily be pinched, so pay attention. Tighten all body bolts. .jpg) Reattach front bumper. The kit does not include provisions for relocating the bumpers (the bumpers mount to the frame, so they sit 2 below stock against the body). The ARB bumper is pretty easy to relocate with 2 pieces of flat steel (see picture). The stock bumper should be easily modified as well.
Reattach front bumper. The kit does not include provisions for relocating the bumpers (the bumpers mount to the frame, so they sit 2 below stock against the body). The ARB bumper is pretty easy to relocate with 2 pieces of flat steel (see picture). The stock bumper should be easily modified as well. 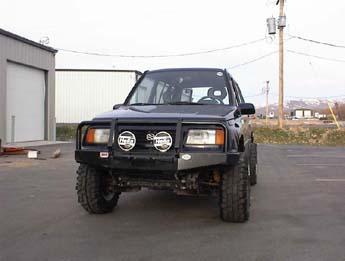 Replace headlights and grill. Remember to reconnect the headlights and turn-signals.
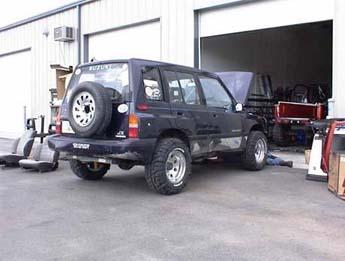
Reattach rear bumper. Currently I am planning on either building or buying a more suitable off-road bumper; so for now, I just reattached the outer bumper cover using the original mount points. However, it would be very easy to fabricate some 2 extensions for the top and to re-drill the lower mounts for the metal inner bumper. Modify and replace console. I had to modify both the console itself and the transfer case shift boot. On the console, I trimmed 3/8 off the rear of the opening of both the transmission and transfer case shifters. I modified inner boot for the transfer case shifter using a knife to add cuts similar to the existing ones down the length of the inner boot. Moab Testing: Two weeks after installing the lift, I headed down to Moab for Zukfari 2001. The increased clearance body was good, but what was great was that my tires no longer hit the body on full articulation, which gave me an inch or two more of travel. While it wont out-articulate my SPOA Sami, it was a nice improvement. One of the problems with the Sidekick is that the body is as low as the frame at the rockers, and it was nice to be able to scrape the frame without causing (more) body damage. I have since replaced the 29×10.50 Thornbirds with 30×9.50 BFG All-Terrains. 31×10.50 BFGs fit great, but my stock drive train starts bogging down on the rocks with 31 tires.
08/19/10 13:32