 with Scott Rossow
SkY-J Update

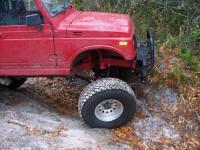
 After upgrading to stock 4 pack YJ springs using the Sky YJ Kit I thought I was ready to hit the trails and show the world my new flex. It did not take long to realize that flex is easy. Good flex seems to take a lot more work, and money. Flex is just thatflexy springs. Good flex doesnt rub or scrub or break anything. I didnt have the good flex. YET!
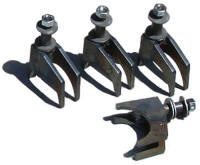
 The first step in finding the good flex was addressing my way too short shock problems. I called Sean at Low Range Offroad and lined up a set of Sky Shock Hoops, a Spidertrax upper rear shock mount and some weld on rear lower mounts. I also purchased a set of Doetsch Tech 8000 shocks for the rear to match the set I had already picked up from one of my Jeep buddies.
 When the brown box arrived I was amazed at the quality, I am not sure why I was amazed, I should be used to getting top notch stuff from Sky and Low Range by now. Even though it was late afternoon when it came in I still went out and held up the Shock hoops in the front wheel wells to see what they were going to look like. Come on now, you would have done that too, at least I wasnt making the vroom vroom noises, lol.
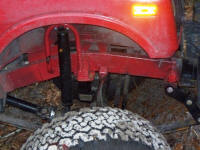
 The next day I had some free time so I went out to the workshop and cut the original shock towers off using a 4 angle grinder with a cutting wheel. After cutting the tower off I switched to a grinding wheel and cleaned the paint off of the bump stop mount because that is the main area to mount the new hoop to. When the correct areas were clean and dressed I got my buddy to weld the hoops on and I bolted up the DT8ks. It looked pretty sweet and rode great too.
 The rear setup was even easier to install, except for the exhaust. A while back I had added a Sky bolt on traction bar, which meant I had to cut and rotate my muffler so they would not hit. The new upper shock mount allows the shocks to be angled inwards for extra length and that was going to put the shock on the drivers side in the exact same place as the exhaust pipe. No problem, I broke out the sawzall and no more exhaust in the way. After that I bolted the upper shock hanger to the existing shock mounts and used the shocks to find the exact location for my new lower shock mounts. Welded the lower mounts on and then bolted up the shocks. Wahoo, now I have way long travel shocks front and rear, so I must have the good flex! NOT YET. Arrrrgh!
  All it took was one trip to the ditch by my house to see that I have MAJOR rubbing and scrubbing issues. Out comes the sawzall again and I removed another 2 inches from each side of the frame tube that used to be part of the front bumper mount. That was easier said than done since I also had to cut through the 1.5 cold rolled solid re-enforcement that was in that frame tube.
 Even after some liberal cutting I have rubbing issues and I have seen the springs bent into frownie faces instead of their usual smilie faces so that means I need bump stops. Check back in next month to see if I can figure out how to measure, fit and fabricate some bump stops.
Source:
Low Range Off-Road, LC 529 N 2740 W Provo, UT 84601 tel (801) 805-6644 fax (801) 805-8188
sales@lowrangeoffroad.com tech@lowrangeoffroad.com
Regular Business Hours Monday – Friday, 9:00am – 5:00pm Mountain Time Saturday, 12:30pm – 5:00pm Mountain Time
08/11/10 15:23:37