 with Scott Rossow
I have a new favorite vendor. Sean Conk at Low Range Offroad is the real deal. I discovered Low Range Offroad when I was researching YJ install kits for my tintop. I wanted top quality and complete front and rear kits from the same company. I did not want the missing link rear shackles and I could not afford to pay an arm and a leg. The Sky YJ leaf spring kits were exactly what I was looking for. Soon I had an e-mail from Low Range Offroad with the shipping information and a tracking number so that I could follow the cross country journey of my brown boxes. It is always nice to know what has shipped and when to expect it. My stuff actually showed up earlier than promised. That was a nice surprise.
 The Sky front and rear YJ install kits were well packaged and way beefier than I had expected. The two kits in one box weighed fifty two pounds. Thats BEEF! Also in the box was an assortment of stickers and business cards to pass out to my buddies, a nice touch.
The install on this kit was straight forward. That is probably best because no instructions were included from Sky, I talked to Sean about that and he indicated that he will be providing them with the sets he sells soon. If you have had any experience with the suspension on your sammi the lack of written instructions wont be a problem. If you get confused, I am sure he can get you back on track quickly.

 All the parts from the kit come as raw metal, so they do have to be painted or powder coated to protect them from the elements. That allows you to make them the color you want and keeps the cost down. Each shackle and bracket came with the bolts in place so that it was easy to see that everything was included. The beefy u-bolt plates are labeled for the front and rear axles too, knowing where everything goes and that it is actually there is the best way to start an install project.
The first step of the install was to put all the nuts and bolts into labeled Ziploc bags, so that I could easily tell what hardware went with which pieces. Next, I cleaned all the parts carefully, first with brake cleaner and then a paint prep cleaning spray. I sprayed a couple of light coats of grey primer on all the pieces. After allowing for drying time I sprayed all of the parts black. Spray paint may not be as durable as the powder coating option but it is faster, cheaper and has the added benefit of being on the shelf in the workshop already. After the paint was dry it was time to get started.

 The plan was to install the springs on one corner of my tintop at a time starting with the rear. I jacked up the drivers side far enough to be able to support the frame so the rear wheel stayed off the ground. It is important to make sure that the truck is sitting solidly while you are working on it for obvious safety reasons. I used 6×6 blocks in a cross stacked pattern, no wobble here.

 I took off the wheel and looked over the suspension setup. Easy enough, two bolts holding the spring on, two bolts for the shock and the four nuts holding the spring plate. Placing the floor jack under the axle I lifted it just enough to take the weight off the spring and then removed the four nuts on the u-bolts holding the axle to the spring and unbolted the shock, top and bottom. Then I removed the top bolt holding the shackle to the frame of the truck. Finally, I removed the bolt holding the spring to the spring hanger towards the middle of the frame. With all the nuts and bolts removed it was time to pull the old spring pack out and begin fitting the YJ spring pack in place.

 The YJ spring pack is much longer than a stock spring, so a re-locating bracket is used to move the front of the spring more towards the center of the vehicle. The bracket bolts to the existing spring hanger with as many as ten bolts for strength. Fitting the new bracket into place it was obvious that the quality of this kit was very high. The fit was perfect, tight and exactly right. I drove in the self tapping screws first to hold everything place while I drilled the holes for the bigger bolts using the bracket as a template to make sure it lined up. This one solid re-location bracket, I ended up using only eight of the ten available fasteners but the bracket is not going anywhere.

 The rear shackle is longer and much more substantial than the stock shackles. There is a brace welded in the middle for additional strength and stability. Using the supplied hardware I bolted it first to the spring and then after putting the spring onto the axle I bolted the shackle to the frame in the stock location. Sliding the shackle over the factory frame bushing was tight so I applied a light coating of bearing grease to help it slide into place. I only snugged the nut up so that everything was easy to move around while attaching the rest of the spring.
 After attaching the shackle to the frame I turned my attention to the Sky spring plate. I was able to re-use the factory u-bolts since I was using the 4 pack YJ springs. Longer u-bolts would probably be needed if you were using more than a 4 pack of springs. I tightened up the u-bolts carefully to make sure that they were in the right place on the axle and evenly tightened.

 With the back and middle connections in place I connected the spring to the relocation bracket. There are two holes to choose from for the spring, I chose the forward most. Lining up the spring eye hole and the hole in the bracket takes some finesse and persuasion but by moving the axle back and forth I was able to finally get the bolt in place and the spring mounted. Finally, I went back and torqued all the bolts and nuts to the proper setting and put the wheel back on.
 The process on the passenger side was almost exactly the same. I did attach the front of the spring to the bracket first and the shackle to the frame last. It really was not any easier or quicker, just different.
After both sides were finished it sat exactly one half inch lower than it had with the previous custom springs. That was key for me because I still had to clear my 33s.

 With both sides of the rear axle finished I moved on to the front axle. Once again I was going to do one corner at a time so I jacked up the truck and securely blocked the frame. Then I removed the tire and spring. The process was a little more complicated than on the rear of the truck because I was running a homemade RUF (Rears Up Front) setup. It is a little more challenging to snake the spring out because of the OTT high steer setup, too.

 Preparation for the actual install involves putting the front, folding shackle together. The two sections are very solid and fit together tightly, very tightly. I used a little grease and a light application of the BFH to maneuver the shackles so that the center bolt hole lined up. In order to connect the shackle to the spring I had to grind a little bit off of the outer edge of my new spring bushing. That only took a few seconds with a bench grinder. If you do this be careful of both, your fingers and not taking too much off of the bushing. It still must to be tight, but with the aftermarket bushings I had they were not going in that shackle without a little resizing.
 Once the folding shackle was on the spring I turned to attaching the relocation bracket for the rear of the spring to the frame of the zuk. The bracket attaches to the existing spring hanger, just like for the rear springs, but it uses only the sides to bolt through. I slide the bracket in place and then marked and drilled the four holes for the bracket bolts, two on the inside and two on the outside. Once the bolts were tightened in place this bracket was solid, its not going anywhere. Because of the box design of the Sky relocation bracket it is much more solid than the homemade relocation plates of the RUF setup I had been using.

 When the bracket was in place it was time to put the 4 pack YJ spring on. I bolted the spring to the rear hanger and then attached the spring to the axle with the spring plate and stock u-bolts. Finally using the supplied bolts I hung the folding shackle on frame. After everything was in place I went back through and tightened all the bolts to the correct torque specs.
 I repeated those steps for the other side and the spring install was finished. Even though the springs are on the truck it was not ready to use yet. A couple of other details still needed to be dealt with. Bump stops for the folding shackles are included with the Sky YJ kit, but I wasnt going to be able to use them because of the way they were designed to be bolted on to the front bumper mounting location. I had long ago beefed up that area of the frame so easy access to the necessary holes was not available. Some welding was required to fit plates for the springs to rest against.
Then there are the drive shafts and shocks. Any time you change suspensions it is very important to make sure the drive shafts are still the correct length, especially when you have changed to a setup that flexes as much as one using YJ springs and folding shackles. My rear drive shaft was alright the way it was, but the front was too long. I am glad I found that before it had a chance to cause an expensive problem, like pushing the drive shaft through the transfer case on extreme compression.
For shocks I was already using longer than stock shocks and it was quite obvious that they were not long enough to keep using with the YJs. New shocks were in order, and if I was going to need longer shocks I guess I should get better shock mounts too. Check back for an update on those. I did find out that driving on the road with no shocks and 4 pack YJ springs is not safe, the uncontrolled bouncing of those light, flexy springs is seriously dangerous. Get the right shocks!
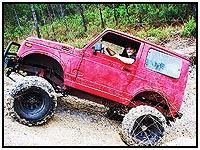
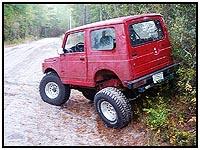
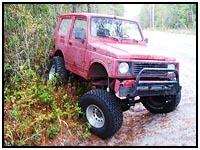
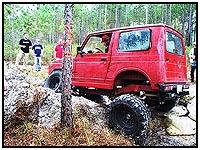
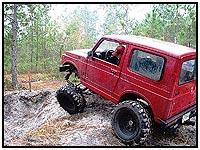
Here are two before and two after shots.
I trailered my tintop to a friends house to see how the new setup would perform. HOLEY KOMOLY! I have flex, serious flex, and I love it. There is still some trimming to do and bump stops to setup, but the ride is so much smoother. This is without a doubt the best the zuk has ever ridden or performed. Thanks Low Range OffRoad and Sky Manufacturing.
Low Range Off-Road, LC 529 N 2740 W Provo, UT 84601 tel (801) 805-6644 fax (801) 805-8188
sales@lowrangeoffroad.com tech@lowrangeoffroad.com
Regular Business Hours Monday – Friday, 9:00am – 5:00pm Mountain Time Saturday, 12:30pm – 5:00pm Mountain Time
08/11/10 15:23:32
