 with Bill Johnston
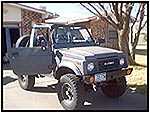
Here we continue the buildup for the Gray Ghost. Last month we showed you how we replaced the seats, steering, front suspension, rear axle and gears and even added a full cage. The tires went to 33×12.50’s and we have cut the hinges to make the doors removable. Next we are going to do a YJ conversion to the rear springs, add wheel spacers, replace the upper rear shock mount and then take it to the trails for some serious testing!
Gone Doorless 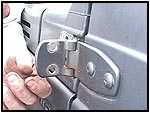
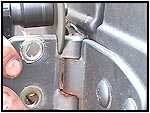 You can trim the hinges while the hinge stays on the body! Just do it one hinge at a time and it will only take about 15 minutes. Here you can see where we unscrewed the ‘door side’ and then sliced off the unwanted top section.
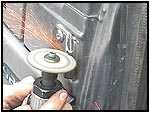
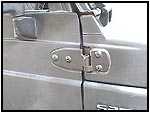 We then trimmed up the center pin so that the door could be installed and removed without hitting the hinge on the body. A few minutes later it was done. Later, the mirrors were moved forward to the body area directly above the hinge. YJ Rear Springs and Wheel Spacers
 When the YJ Rear Conversion Kit arrived from Trail Tough, I was surprised at the simplicity. If you can drill a few holes, you can install this kit in about an hour. The front brackets seen at the top of the photo to the left get bolted over the stock brackets. They move the front mounting point forward to allow the longer springs. You can see the difference in the photo to the right. The rear shackles are specially designed to fit the stock body mounts and also fit the wider spring eye. The spring plates are wider to position the u-bolts outside of the wider springs.
  You have to pull the stock spring completely out, so we opted to do one side at a time. You will also note that we added some Spidertrax wheel spacers. When going to a 33×12.50 tire it became a ‘need to have’ so that they wouldn’t destroy themselves on the front springs. We could have gone with a set of custom backspaced wheels, but the owner wasn’t sure what wheels he would end up with, so this took care of the problem without getting ‘stuck’ without any choices later. Test Twist 2
 Once the rear suspension was completed, we threw it up on the stands again. This time we left the tires at full pressure (20 psi). Getting a full 32″ of twist was no problem anymore. And amazingly, the front and back suspension systems (although different styles and different manufacturers) were perfectly balanced. The front and the back twisted at the same rate and angle.
 Look how much this new suspension droops! With lockers front and back, and a heavy tire it will keep the tires on the ground longer through the rough stuff out on the trail. ‘Big Air’ is great for a magazine cover, but it is never as controlled as a well balanced suspension with plenty of (useable) droop. Billet Upper Rear Shock Mount
 We realized during the last ‘twist test’ that the shocks were limiting the suspension. We decided to angle the rear shocks with the help of a new billet component from Spidertrax. This is another quick bolt-on that can be done in less than an hour. It allows the use of longer shocks for more axle travel.

 One thing we have noticed about zooks is that no two are built exactly the same. This component is well constructed with some ‘wiggle room’ planned in just in case the stock shock mounts are a little ‘off’. Once bolted down, it is a solid base with two different angles to set up your shocks.
Trail Testing! It was finally time to take it out on the trail to see if the improvements gave our project vehicle the added ‘edge’ we were looking for!
08/11/10 14:51
