 Seasoned Rookie with Murph, The Seasoned Rookie.
Greetings, Rookies.
Something many of us have to deal with from time to time is separating and reuniting tire and rim. The reasons for this are manyfold. Sometimes it’s a case of vehicular improvement: A jeep owner in the campground next to us has nicer tires than ours, but we don’t swap them out in the middle of the night because you’re quite sure he’ll notice that his Ronal Bear rims are now on your truck. Other times, its a simple matter of repairs needed.
The most common (and annoying) is when mud and other debris finds its way into the space between the tire and rim, which after airing down is no big challenge since it happens automatically..
This debris breaks the tight seal between rubber and metal and can create a leak ranging from pinhole to “holds some air for a while.”
Until now, I’ve had two options:
Take the truck to the local tire establishment and pay them 10-15 bucks a tire to remove, clean, and remount. Sometimes they would do the job well.
Using a Rube Goldberg arrangement of jacks, use the weight of the truck and the base of the jack to break the seal, push the tire all the way down, and then get your fingers in there and scrape most of the dirt out, then reinflate the tire. This will get you home in a pinch.
The combined cons of these options amount to expense, inconvenience, risk of tire damage, squashed fingers, and doing a half-tailed job.
Recently, on a visit to Harbor Freight in East Peoria (face it, people like us browse around stores like this with the same wonder and amusement that high-schoolers have about Spencer’s,) I saw a nifty device… a Manual Tire Changer … on sale for $39.99. How bad could this possibly be? Even if I used it once to clean ALL of my rims, hated it, and gave it away, I’d still be ahead financially somehow.
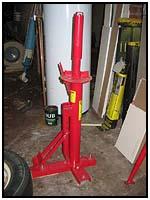 The Harbor Freight tire changer (ITEM 34542-8VGA) worked as promised. Many people hear the name Harbor Freight and run the other way as they are known for inexpensive functional tools and not much more. However — this is a device you may use five times a year. No need to invest in the top end device.
Assembly of the tool is child’s play — the interesting part, however, is in the mounting onto the floor. The tool must be bolted securely to the floor in order to work properly. I have read reports of people mounting it to a sheet of heavy plywood, or a pallet which provides SOME stability, but not enough from what I have read.
There are several methods one can use to mount this to the floor — please consult your local hardware store for their advice based on the material which you intend to mount into.
Now for the fun part! How it works
I happened to have a spare which held no air. I knew there were no holes in it Id patched them all last season. Must be the rim.
Using the machine is fairly intuitive. There is only one tool with a few different ends, and once you learn how each end functions, the job gets a little easier. The first tire you do will be very awkward and will take a very long time.
Something else Ive learned is that the larger the tire, the easier it is to use. A stock tire was used in this demonstration and it was a bit tight, but it did work. I would NOT recommend this machine if you have rims that would classify as NICE. Steel wagon wheels, perfect. Fancy aluminum rims from your Acura? No way. This machine functions in a very aggressive way and you WILL damage nice wheels with the forces involved.
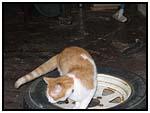 First and foremost, understand that your judgment is second best. Have one of your pets (in this case, Elwood) inspect the rim for minor defects.
Next step is to open the airways. Using a valve stem tool, remove the core from the inside of the valve stem.
ROOKIE TIP: Next time youre at the local parts-o-rama, buy a few packages of valve stems and replacement valve cores. Oftentimes these valve stems take some hits on the trails and its REALLY easy to replace with the rims off. Also, those little valve cores love to shoot across the room powered by a tire full of compressed air. Have extras.
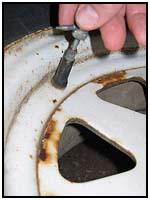 Dont skip this step. You may think, my tire is already flat, but the process is much easier if the tire can flop around without any resistance at all. Trust me.
Next thing youll need to do is break the bead. No, no put your hippie jewelry down. Not that way. The bead is the part of the tire which seats against the edge of the rim. Its held in there by friction and magic, and now we have to get it off.
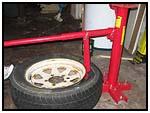 The base of the Tire Fixer Machine has a bead breaker built right in
Just insert the handle, put the tire in place, and use the miracle of leverage to slide the tire down off the bead area. Youll have to do this in at least three different places on the rim to break it free.
Flip the tire over and repeat on the other side.
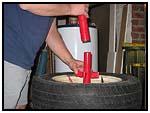 Youre now ready to mount the tire onto the machine.
This part is fairly easy to figure out drop the rim onto the spindle and pull the locating pin up through one of the lug nut holes. Next comes what is called the spider install the spider pointed end down. This will help lock the rim down. The unnamed threaded locknut goes next, spin it down tightly and give it a GENTLE torquing down.
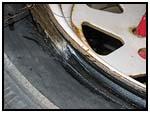 Although I havent tried this, I would think that mounting the tire upside down would be a good idea if you didnt want to mess up the paint on your rim. Just put some sort of pad between the rim and the plate.
Lubrication is next. Many people recommend buying actual tire-machine lube. Ive not tried this yet. If Harbor Freight had some in stock the day I bought the machine, I might have. I used regular liquid laundry soap its thick and sticks well to the surfaces in question.
 Put about two spoonfuls (not much!) into an old coffee mug and using an old paintbrush, put a nice layer on as much of the tire bead as you can, as well as the rim area near it. No need to goop it on like grease just a nice skin. Too much will cause you grief.
Using the pointed end of the tool, stick the end between the tire and rim and push down, pulling a portion of the tire up and over the rim. Then, pull the bar around the pole which will continue this motion around the rim. Confused? Good. Heres a small video to help explain what I could not:
(Move your mouse over the video rectangle below to activate the video) Helpful Video Clip (Dialup Warning: 2.3MB)
Repeat this step for the lower bead if you try to pull the tire up a bit off the rim, you can stick the tool into the gap and do the spiral chase-around one more time. Sinfully easy. Sort of.
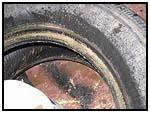 You’ll see once you have the tire off, there is a good deal of crappo stuck to the tire.
After youve separated the tire and rim, get a bucket, a stiff brush, and something suitable for scraping. Put some warm soapy water in the bucket and scrub the bead of the tire clean. You may even find small pebbles embedded in the rubber. Carefully get them out using a screwdriver or similar tool. Use an ugly old towel to wipe off the yuk, then stand the tire up on end and throw the towel in the tire to soak up the water that got in there.
 Do the same to the rim remove it from the machine and give it a good cleaning, and wipe it down.
Get out the brush and a little soap and now paint a nice thin layer of soap on the bead both sides, and get the inside and the outer edge. This is going to help slide the tire over the rim. Do the rim too if you have soap left over, but dont make a federal case out of it.
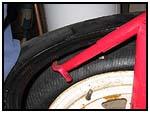 Put the tire on top of the rim and then push it off center a bit, then use the odd end of the pole for this part. There are two ways to hold it for the lower bead, use the tool as shown.
But before we continue do you have the tire facing the right way? White letters facing the way you want them to?
Using the same circular motion as you used to remove the tire, push the rubber down on the rim. This is generally the easiest step.
The next one, however, is a little trickier. Use the spooned end of the tool this time with the hooked end riding around the rim edge. This part will frustrate you until you scream.
(Move your mouse over the video rectangle below to activate the video) Helpful Video Clip(Dialup Warning: 9.76MB)(Content Warning: PG13)
Repeat the previous steps for the other four tires and youre in business.
The first tire I did was extremely frustrating. After the second one though, youll develop a rhythm and get a feeling for how to do it.
Happy Retiring!
Murph The Seasoned Rookie
08/11/10 14:36
