 with Donald Roberts
Samurai Power Steering Conversion
Photos by Donald, arms by Popeye
 He’s strong to the finish ’cause he eats his spinach, he’s Popeye the Sailor man! So goes the Cartoon song. With the new 33 inch Baja Claw tires mounted on my samurai it took all the strength I could muster to turn the steering wheel while in slow go mode up in the rocks. Naturally my arms started to grow larger with all the new muscle development this steering wheel workout was providing. I would hear Co-workers whispering to one another when ever I walked by or during meetings I would catch them looking at my Popeye arms. I was starting to catch hell from my wife; “Please remove your hand from my shoulder, your crushing
 me”. Clearly Popeye arms were not babe magnet material, Popeye couldn’t even keep Olive Oyl interested. So I decided it was time for a power steering conversion. I looked at the various kits available from the vendors listed on the iZook.com Links page and decided the Trail Tough Power Steering kit would work best for my personal vehicle. Start your conversion by unbolting the fan guard, then draining and removing the radiator. Disconnect the steering linkage attached to the pitman arm and also the steering shaft.

 Remove the stock steering rag joint as shown in the left photo. Discard them. Remove the stock manual steering box by unbolting the 3 bolts using a 17 mm socket or wrench. Clean off any dirt and/or grease on the frame rail in preparation for drilling the frame. Temporarily mount the new power steering box to the frame using the lower mounting hole as shown in photo on right. Mark the other two holes with the box in place. Remove the power steering box. Using a transfer punch, mark the two centers of the holes to be drilled, BE PRECISE! Don’t use a common center punch, its going to steer you wrong (ok bad pun, couldn’t resist it). Using a half-inch (1/2″) drill bit, drill the two holes clear through the inside frame rail and the outside frame rail. Be careful not to drill them crooked.
 A template is included by Trail Tough for the wheel side frame rail if you wish to use it. I did not need it. Using a three quarter (3/4″) drill bit, re-drill the two holes you just drilled on the outside (the wheel side) frame rail. DO NOT re-drill the two holes on the inside (engine side) frame rail to inches! Insert two spacers from the wheel side of frame into ” holes. Mount power steering box with 3 nuts and bolts.
  Weld 2 spacers to frame as shown in photo. Do not weld the nuts or bolts. Re-install steering linkage to pitman arm. Remember to insert a new cotter pin. Note that the pulley is only included in the 1300 kit (#SPS-351, which is why it cost just a little bit more). Remove the 4 bolts from the crankshaft pulley, do not remove the pulley. Add the new power steering pulley in front of stock pulley and re-install the 4 bolts
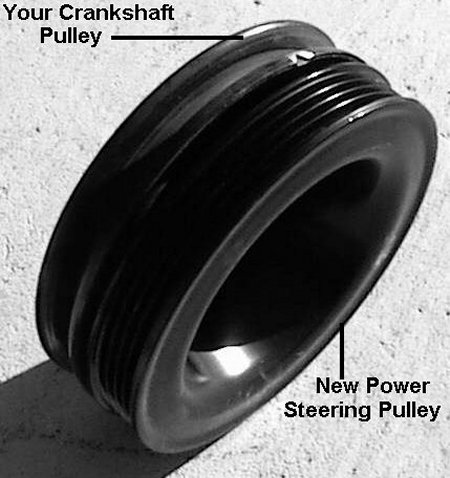 . Remove old pump fluid return hoses by loosening hose clamps. If it does not have a hose clamp, do not loosen it, it’s not a return hose. Install new hoses included with kit & tighten the clamps. Before going on to the next step, carefully examine the hardware you are about to install. Do the nuts, bolts and lock washers look stout and strong, or weak and wimpy? Now is the time to replace faulty hardware. Install new U-Joint to power steering box shaft and to steering wheel shaft using 2 stock nuts, lock washers and bolts previously removed from rag joint. Steering shaft will need to be shortened approximately 2″ to allow new U-Joint to fit. You can shorten using a block of wood and a hammer. Shorten it in small increments checking for fit before you shorten again. Notice there is a small nylon insert that normally prevents it from moving. Remember to re-install bolt through U-Joint and at shaft of power steering box.
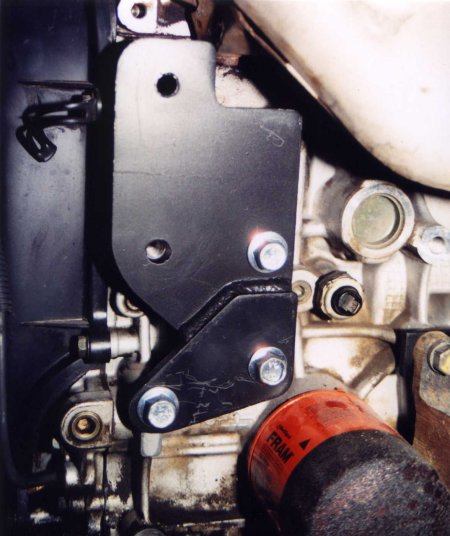
 Attach adapter bracket to engine block as shown in left photo. Bracket may have to be notched to fit on some vehicles using stock exhaust manifolds, and depending on vehicle year. At the time I was using a stock 1.3 exhaust manifold on my 1.3 so I clearanced the manifold using a hand grinder. Attach Pump to engine bracket as shown in right photo. Mount fluid reservoir upright to any convenient location, Trail Tough recommended mounting on last web of inner fender at firewall, I mounted in the left front corner near the headlight. A rectangular spacer bracket is included to assist in diverse mounting locations.
 Install new belt included with kit and tighten belt tension by adjusting pump. Add new power steering fluid to reservoir to the correct cold level while engine is OFF. This may take several applications while pump; box and lines continue to fill with fluid. Re-install radiator and fill with new anti-freeze. All done! I always thought spinach tasted awful. Wonder if Popeye ever ate anything else? END.
08/11/10 15:19:38
[tech/footer.htm]