
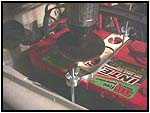
 After removing the battery and cleaning up the battery tray, we found a threaded mounting boss that Suzuki put in at the factory. Using the button head screw, we installed the angled tab provided with the kit. We also found that if you add a washer to the screw it will keep the angled tab from bending (or straightening).

 The short hook attaches to the fender in the stock location. There are actually two holes in the fender, so make sure to use the hole that lines up with the center of the battery. The long hook attaches to the bracket we just installed with the button head screw.
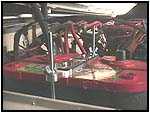 These hooks are made long so they will fit the tallest batteries. Once you have them installed it’s time to trim them for that finished look. We used a cutoff wheel, but a simple hacksaw will do the job. Leave an inch or so of thread for plenty of room for adjustment when removing and installing them again later. With proper care these tie downs will last longer than a battery, so you will appreciate this later.
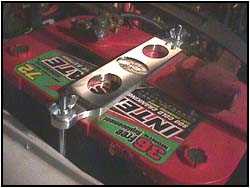 And the finished look!
Sure beats the heck out of the bungee cord, eh? This is an easy install that makes something as simple as a battery tie down into a work of art.
Sources:
PetroworksBox 848 Fallbrook CA 92088www.petroworks.com1-800-952-8915 Orders 1-760-731-9434 Tech & Questions
Rocky Road Outfitters P.O. Box 681245 Park City, UT 84068 www.rocky-road.com 1-888-801-7271 Orders 1-435-783-2990 Tech1-435-783-4355 Fax
08/11/10 15:20