 with Brian Beck (Filter)
Sound Judgment
Some folks need to have a monster sound system in their rig, we understand. But sometimes our trail rigs see more weather than we had planned on and that expensive head unit turns into trash real quick. Here is a quick ‘how-to’ from one of our readers that shows how to actually eliminate that head unit without giving up trail tunes. With the popularity of personal sound systems that let you carry thousands tunes in an MP3 format, this will let you use that personal player to dish out the music through your stock speakers (or whatever you have in place). It will also allow you to keep the player mobile so that any local ‘bad element’ doesn’t see anything they want to take from you. If they look in and see no head unit, they will usually pass you by.
This system will run the sound from your player through an amplifier and out to your speakers. The amplifier is a needed component because the player is only designed to provide enough power for headphones. The speakers will require more to sound right.
You will need.
- Electrical tape
- Wire strippers
- Power and ground wires
- Speaker wire
- 2 Fuse holders
- 1 3.5mm stereo jack
- 1 3.5mm stereo jumper cable
- RCA cable
- A Drill and drill bits
- 4 Sheet metal screws
- Soldering Iron and Solder (rosin core)
- And a Phillips screw driver
 The first thing I did was mount an amp. I used 2 strips of wood to raise it off the floor for two reasons. 1 for air flow and 2 in case of water. The amp is just mounted to the floor with some inch long sheet metal screws. Pre-drill your holes it will make life easier for you. The amp can be installed just about anywhere you have space, but make sure it is out of harms way and still has plenty of air around it for cooling.
  Next I wired up the power to the amp. Please excuse the wire colors. I used what I had on hand.
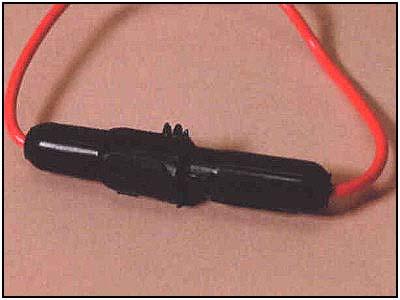 The black is goes to the ground (negative side of the battery) The brown goes to a switched power. I used the cigarette lighter power since it supplies power with the turn of the key. The green is the constant power (positive side of the battery). Remember to add fuses on the power leads. I used this style fuse holder. They work and they are cheap.
I wired the speakers with the left front and left rear together, then the right front and right rear together. I did this because as you can see I only installed a 2 channel amp. 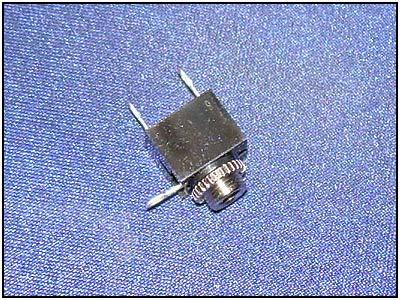 The player will normally only supply two channels anyway, so why go any bigger? Negative on the amp goes to the negative on the speaker. Same for the positive.
Once you have the power to the amp and the speakers wired up, it’s time to mount the 3.5mm jack. I got this at Radio Shack (part # 274-249), they come in packs of 2 and cost me $2.99 + tax.
 I drilled a hole in the dash to mount the 3.5mm jack. You don’t really have to hide it, so choose a place that is convenient. Most folks will never notice it.
Now that you have the hole drilled you can figure out how long of a cable you need. I think mine ended up to be about 7 feet. Always make them longer than what you need.
 I took my old RCA cables and cut them to the right length. Then stripped back the shielding. The outer shielding wires on both sides gets wired together as a common ground.
 Now to make things easier on myself I soldered some wires onto the small ends of the 3.5mm jack. Again please excuse the green wire. Just pretend it’s red.
 Now you just solder them to your RCA cable. Black to the outer shielding wires. White to the left side and red to the right side. (Green in my case)
 Now time to tape up your new cable. Make sure you tape or shrink wrap each wire connection by it’s self. Then you can tape them all together to make a nice neat cable.

 All that is left to do now is mount the 3.5mm jack in the dash and run the RCA cables to the amp.
 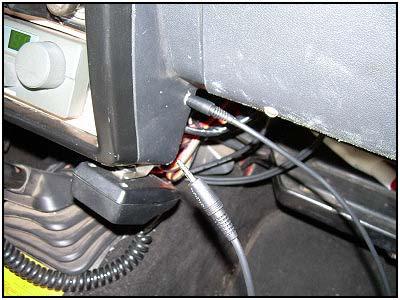 Now it’s time to enjoy your new stereo. Plug in your 3.5mm stereo jumper cable into the 3.5mm jack and into your MP3 player, portable CD player, XM radio, Sirius radio, laptop, or whatever else you want to.
08/11/10 15:03:19