
 with Bill Johnston
Spidertrax Anti-Wrap Kit
 With all the different options in suspension systems on the road today, many Zook owners have found it difficult to choose a ride that is strong enough for their brand of ‘wheelin’, yet is soft enough to be comfortable. When we installed the YJ springs on our white Zook, we thought it was perfect. But we soon realized that the soft ride came with a price. It had plenty of spring wrap! Spring wrap can cause broken springs, snapped u-joints and lots of headache when you are on a tough trail far from the main road.
A traction bar can take the spring wrap out of the equation, but you have to choose the right one for your application. We installed a triangulated (looks like a triangle) traction bar in the past, and it worked very well. Too well in fact, as it transferred all of the drive train power directly to the wheels. In a trail rig, that worked amazingly well. But after driving the same rig on the street for a few months, the steady shock loads finally took their toll on the worn transfer case gears and killed the transfer case. What we needed was a traction aid that still left a little play in the drive train, kind of a ‘buffer’, so the gearing could work smoothly again.
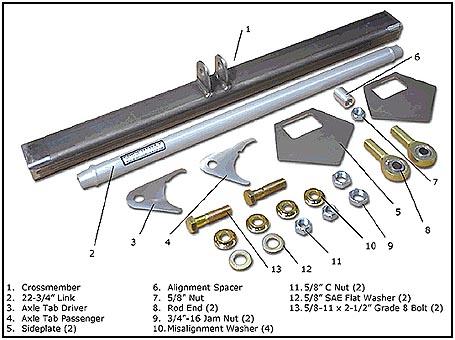
 We went to Spidertrax and explained the problem. They told us about their Anti-Wrap Kit that used a single bar to control the axle movement. On the right you can see everything that ships with the kit. Above is a picture of the parts we needed for our application. This Anti-Wrap Kit would be installed on a Spidertrax Rear Sidewinder axle housing, so the mounting brackets needed to be just a little different. The axle tabs (3&4 in the photo) are made to fit around the rear axle tube and line up on the welded bead that runs down its length. You can see the notches cut out for the bead quite clearly. The Sidewinder axle tube doesn’t have such a bead, and the center housing is so large that the tabs would have to be attached there instead. So you see the tabs we used in the picture above, on the far left.

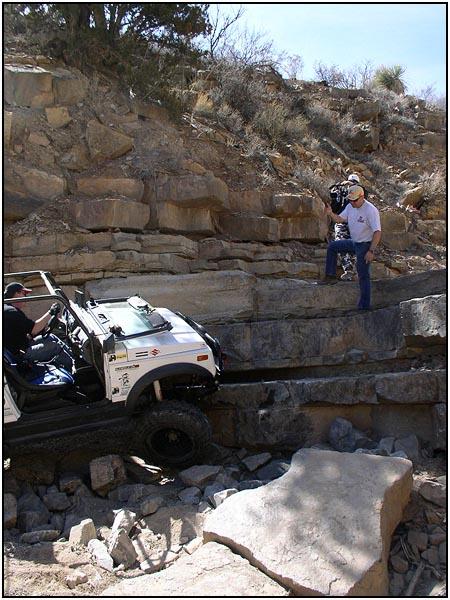
 The Spidertrax Anti-Wrap Kit can be installed with the vehicle flat on the ground, but to make it a little easier for you to see how we did it, we supported the rear axle on jack stands and removed the tires. The suspension stayed right where it would normally be if it was still resting on its tires.
 Once everything was secured, it was time to slide the new cross member into place. This cross member rests on top of the frame and its placement can be adjusted to fit various axle locations. Welding it in place will be one of the last steps.
 The tabs on the cross member point down and are offset to the drivers side. This lets the bar fall between the driveshaft and the exhaust. Rod ends (heim joints) are attached to the bar using misalignment washers, then the bar can twist and while the suspension articulates.
 It is best to install the rod ends half way into the bar so that there is plenty of adjustment available in both directions.
Also, look closely at the driveshaft. You will notice an adapter that comes very close to the new cross member. Make sure there is sufficient clearance between the driveshaft and the cross member. Ours came too close for comfort, so we raised the cross member using small shims between the cross member and the frame.

08/11/10 15:24:05
[tech/footer.htm]