
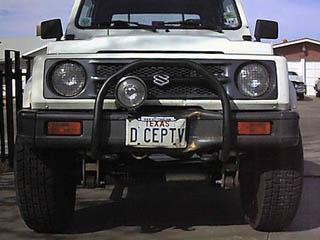
 When I first bought my ’92 Samurai, I was afraid of the definite lack of protection from the front and rear. My old Dodge Charger had huge bumpers to keep me out of trouble. The stock Suzuki bumpers are a joke. One kick with a good boot will dent them. I immediately had a “brush guard” built for the front end that could stand a good jolt. Figure 1 shows the brush guard and stock bumper after taking out an eight inch tree. With out the additional protection of the bar, I wouldn’t have been able to drive home that day. Now I had two options, I could use a sticker that says “Place tree here”, or get a new bumper…
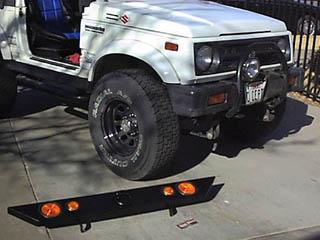
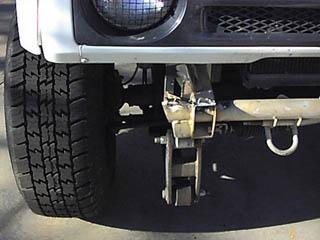
I chose to go with the Crawler Front Bumper from Summit Off-Road (figure 2). The company has just undergone a name change, so you will now find them as Rocky Road Outfitters but the equipment still has the same famous “lifetime” warranty, You buy it for Life! The Crawler was a bolt on upgrade. We had to grind off the aftermarket brush guard, but if you are still running just the stock bumper, it should only take about 1.5 hours to install.
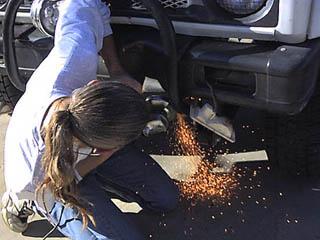
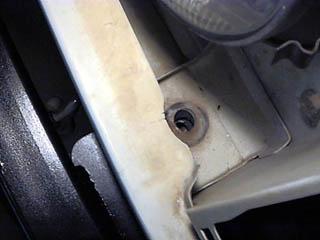
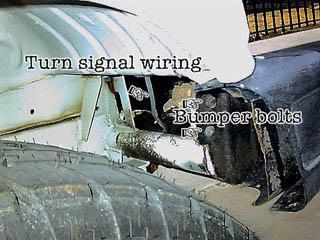 I had to borrow a grinder to take off the aftermarket brush guard. What I didn’t plan on was the interest my friend (the owner of the grinder). He came by to drop it off, and ended up helping with the install. The brush guard had been welded to the frame above and around the bumper to the factory tow hooks at the front of the vehicle. These had to be removed anyway so no loss. The way the brush guard was mounted made it easier to just grind it off instead of unbolting the hooks. For those with the stock front bumper, all you have to do is remove the bolts at the ends of the bumper where it attaches to the “ears” of the front tube (see figure 4). If you follow the wiring behind the turn signals, you can disconnect the wiring harness under the hood. It will all pull out to make it easier to install in the new bumper. Then remove the factory tow hooks that are attached to the frame. Keep the bolts, these will be used later to attach the bumper.
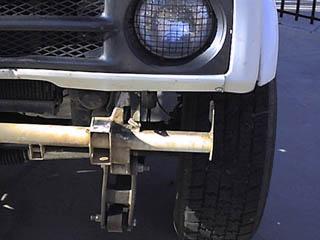
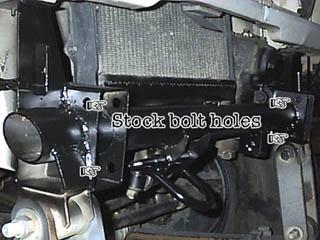
After the bumper has been dumped in the trash… it’s time to remove the “ears”. These are the ends of the front tube that extends out on either side of the frame. A hacksaw and about 5 minutes work make it easy surgery. Figure 5 shows an “ear” before the hacksaw, figure 6 shows the other side afterwards. This makes the front end look kind of naked! I opted to spray on a little bit of paint to make things “disappear” once the bumper is bolted on. Check out figure 8 to see where the bumper brackets will be bolted to the stock bolt holes in the frame. 
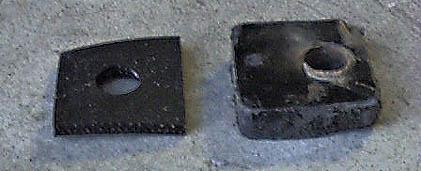
 At this point you must remove the grill to make the front body mounting bolts accessible. They are located right next to the headlights. Figure 9 shows the difference between the stock body pad (right) and the new pad (left) included in the kit. The new pad must be thinner to provide room for the bracket, giving the bumper additional mounting points. These give the Crawler additional stability by using 6 mounting points instead of just four. The bumper bracket mounting points position vary just a little from vehicle to vehicle. Years of use and abuse will flex your frame enough to make pre-drilled holes a problem. Because of this, the bolt hole must be drilled according to your vehicle. To make this easy, just bolt up the Crawler to the mounting points shown in figure 8. Adjust the Crawler so that it is straight and perpendicular to the ground. Then mark the upper bracket through the bolt hole shown in figure 10 (both left and right sides). Remove the Crawler and drill the holes as marked.
 This is the best time to do the wiring for the lights. You will be using the factory wiring harness that had been removed earlier. Snip the wires at the back of the lamp housing shown in figure 11 and run it through the rubber grommet at the back of the bumper. It is shown in figure 12 after final assembly. The instructions suggest using a test light to figure out which wire goes where. My findings are diagrammed in figure 13 with color codes noted.
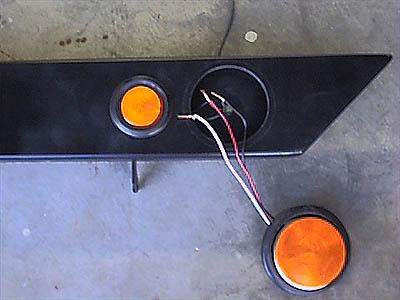
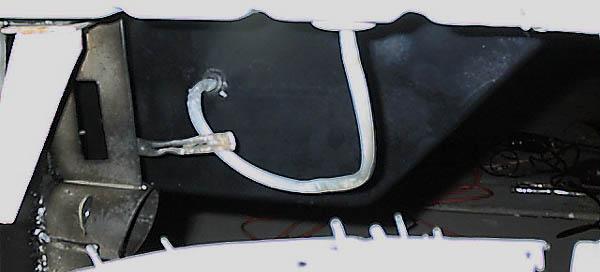 Figure 14 shows “real life”, but it is harder to make out the connections. I like to solder all of my connections for a good contact. After soldering the wires, I used cone shaped wiring nuts (found in most automotive stores) to cover the ends. Why use wiring nuts? What happens if you are a long way from home (maybe a trip to Moab? or Tellico?) and have to replace the light before driving it home? This allows me to snip the wires, replace the light, and then use the nuts to keep everything tight until I get home to solder them up again. Another suggestion here… I used a little RTV Black silicone adhesive to seal the wire/grommet combination from the elements. Here in El Paso, rust is something we seldom see. But everyone doesn’t have that advantage…
 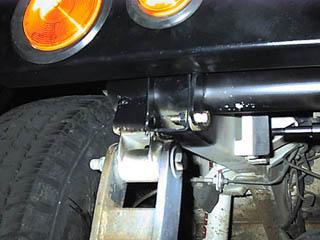 Now you are ready for the final assembly. Bolt the bumper back on loosely using the four frame bolts, then insert the front body mount bolts using the thinner rubber pads. the bottom bolt on the passenger side is shown in figure 15. Make sure everything is straight, then tighten everything down. Plug the wiring harness back in and check the lights to make sure everything works.
Now your ready to hit the trails!
by Bill Johnston
08/11/10 15:05