 with Scott Yach (aka RockRat)
Ring and Pinion Installation
This article is general and starting after your carriers have been removed from the axle housings. After receiving your new gears, check both boxes and contents and make sure all necessary parts are there. Double check ring gear and pinion for matching numbers, be careful not to mix gears because R/P are matched sets. Wash all gears in a solvent i.e., mineral spirits, brake clean, or whatever. Start by removing the old ring gear from the housing.
(Note: If this is your first gear installation, use some marking compound on the ring gear and rotate gears in both dir. to get a visual “feel” for what your finished pattern should look like before removing the gears)
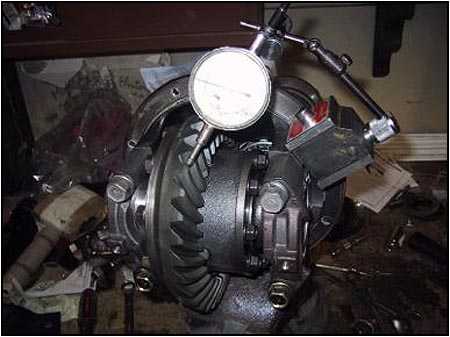
Clean the carrier and check bearings and races, it is not always necessary to replace them if they are in good shape. If there is any doubt, replace them, also do not mix the carrier bearings and races up. I like to wash each side down and set them in the packing material that the new gears were shipped in, in the correct order that they were removed. At this point all parts should be cleaned and visually inspected. You should have a setup similar to this, notice I have already installed my new ring gear using lock tight and installing bolts to correct torque specification. This is where your factory service manual comes in handy.
 Next in order would be to use a depth gauge micrometer and get the depth on the existing pinion in the housing, it helps as a reference for installing your shims on the new pinion for depth. Write this number down for later use.
  Next, remove the pinion from the housing and clean it. If bearings are good remove them with a bearing splitter, a press is recommended.(… but a vise, wood block and a good dead blow hammer have been known to be used in the past). Next take the depth measurement marked on the pinion head and compare to the depth recorded during disassembly add or subtract the difference to match spacers to get you to the new specified depth. Install new pinion into the housing. I like to use the old crush sleeve initially while checking for correct depth.
  Once this is done, it ‘s time to check you wear pattern. Apply a small amount of gear oil onto a piece of cardboard and mix in some marking compound, brush onto face and heel of 4-5 teeth on the ring gear. Rotate gears until a definite pattern starts to reveal itself.
(Mental note: What did it look like when you checked your old gears?)
 If the pattern looks good, I disassemble, install the new crush sleeve, and start torquing the pinion nut down. Remember, it can take up to 400 foot pounds to even begin to crush the sleeve, but once it starts preload comes up very quickly. Take it slow. I use a piece of 2×2 angle and bolt it to the pinion flange and use a breaker bar to get started, periodically checking preload with an inch pound dial type torque wrench until the preload is to spec.
 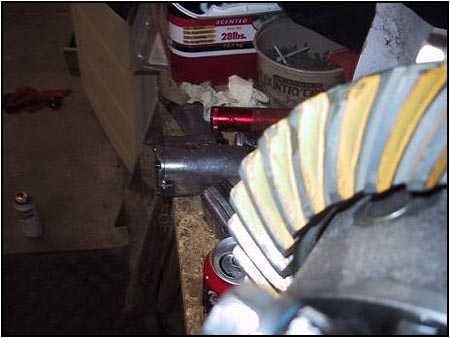 Once the preload is set on the pinion I reinstall the carrier assembly. Set it up to proper backlash again, then start tightening the side spanner disks. Periodically recheck backlash and tighten the corresponding spanner to keep backlash to spec. From every one I have talked too there has never been a gear failure in this style carrier due to over preload on the side bearings. Frankly, I don’t think you can over load the carrier bearings unless you use a 5′ breaker bar on your spanner wrench. Anyway, after you feel you have correct preload on the ring gear and your backlash is still correct, Brush on some more marking compound and double check your wear pattern. If it looks correct you should be good to go. There should be examples of wear patterns provided with your gears. Also remember good diff oil and proper break-in period based on your gear mfg. spec and they should last you a long time. … Scott aka RockRat
08/11/10 15:09