 with Jbird
The Swap
 Sunday morning was the point of no return. I knew that once I removed the air box from the top of the carb and started removing vacuum hoses there was no going back. I removed every vacuum hose connected to the carb and unplugged all of the wire connections. When I disconnected the two coolant lines from the carb, I tried to keep them straight up so I wouldnt loose coolant. I loosened and removed the 4 nuts holding the carb down. (12mm box wrench) Then I very carefully broke the carb loose. I was lucky and the gasket stayed on the spacer and didnt tear. Once the stock carb was out of the way I finished removing any remaining vacuum hoses and/or things connected to them. Of the 2 coolant hoses that I removed from the carb, I completely removed the shorter hose from the manifold. I attached the longer one to where the short one entered the manifold. I did this quickly so that I wouldnt loose too much coolant. I capped off the 2 hoses coming from the EGR. I decided Id wait till a later date to fabricate a plate and remove the EGR.
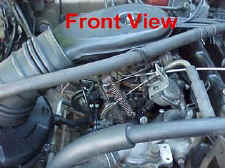
 I took a large flat screwdriver and very carefully pried up the spacer from the manifold. I was lucky and the gasket stayed on the spacer. I turned the Pony carb upside down and placed the spacer on the carb like it would be if mounted. I made sure all of the bolt holes were lined up. (It is extremely important to remember that the Pony will mount 180* from the way the stock carb is mounted and that the linkage will now be to the front.) I inspected where the spacer hung over and blocked the Ponys primary and secondary bores. I used the dremel tool with the grinder attachment to slowly remove some of the spacer material to open up the holes. This was a slow process and could not be rushed. I angled or tapered the holes to line up flush with the Ponys bores. Next I checked the spacer on the intake manifold. I was able to remove a lot of material because the spacer holes werent as big as the openings in the manifold. I stopped grinding once I was happy with the spacer matching up to both the manifold and the carb.
 Before I could bolt the Pony down I had to replace the stock studs with the longer studs I had bought. I soaked all 4 stock studs with WD40 and then used 2 of the stud nuts and threaded them onto one of the stock studs. I used 2 box wrenches and locked the nuts together. Then I very slowly turned both wrenches and removed the stud from the manifold. I repeated this process with the 3 remaining stock studs to remove them. I then threaded in the 4 longer studs. I put a very thin layer of Permatex on both sides of the spacer then placed it on the manifold and then the carb on the spacer. When I tried to secure the carb on the studs only 2 nuts went on OK. The other 2 nuts were too wide and hit the body of the carb. I clamped them in a pair of Visegrips one at a time and used my bench grinder to take the lip off the nuts. (I would recommend that 2 new nuts, which fit better, be purchased beforehand.) I tightened all 4 nuts down and was now ready to hook up the cables and vacuum line.
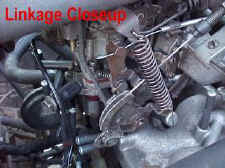
 I used the closest vacuum port on the carb and ran a hose from it to the vacuum advance. The choke cable was a breeze to install. The throttle cable gave me a little trouble. When I connected the throttle cable to the linkage the outer part of the throttle cable missed the clamp. In other words the center part of the cable was to long. So I wrapped the inner wire around the linkage then tried to clamp the outer part to the carb. I was not happy with this setup but decided it would work until I had time to make a new bracket.
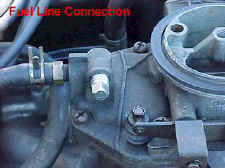
 The fuel line went on without any trouble. I thought I was ready to start the engine up so I pulled the choke and turned the key. It had to crank for awhile because the carb had no gas in it. But then the engine fired up! But it wouldnt idle at all. I realized I forgot the wire that has to be connected. It took a little while to figure this out. We looked at the stock carb and found a solenoid that was similar to the one on the Pony. I traced that wire to the wiring harness. It was a black wire with a white tracer that had yellow stripes about every inch or so. I spliced the wire from the harness to the wire from the Pony and started the engine again. It worked and the engine had a little better idle. There is a small thumbscrew at the base of the carb on the passenger side that I think is the idle mixture adjustment. I messed with this and the idle screw trying to find the best setting.
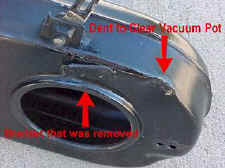
 It was time for a test drive so I tried to replace the air bowl and realized I forgot to swap the stud from the stock carb to the Pony. The stock stud was to small so I used an 8mm bolt to secure the air bowl instead of a stud. I had to dent in a little bit of the air bowl to clear a vacuum pot on the Pony. I used 3/8 extension and a hammer. The air bowl didnt seal down really tight to the carb because it was hitting the thing that returns the idle slowly. I decided to worry about this after the test drive. The first thing I noticed during the test drive was the engine wanted to almost stall when I was starting to move in 1st gear. Once the Samurai was moving and over 1500RPM it was fine. It definitely had more HP. I drove it back and wanted to fine-tune it some more.
 I decided to remove the thing that slowly brings the engine to idle. It was one more vacuum hose I didnt need. The air bowl now sealed great.
 There is a small piece of metal on the underside of the air bowl that needed to be removed because it interferes with the linkage. I used the dremel tool to cut it off. I spent a lot of time trying to get the best idle. I have factory air so I set the idle about 1100 RPM. This helped the engine when the compressor kicked in.
 Later in the day when I was test-driving I stopped by my Fathers house. He helped me fabricate a bracket for the throttle cable. We used a 3 angle bracket and cut a little off each end. We used the bigger bracket because it was stronger. I drilled a hole in the bracket the same size as the threaded portion of the throttle cable. I had to cut a slit into the hole so the inner part of the cable could slide in. I then screwed the angle bracket to the carb. With a nut on either side of the angle bracket I was able to adjust the throttle cable and take the slack out of it.
Summary
There were only a few problems I ran into during the swap. Alexs instructions were great except for the following:
- Two of the nuts that bolt the carb down were to big and hit the body of the carb.
- The Ponys throttle cable clamp did not work for me.
- I had trouble finding which wire to connect to the Pony.
- I had to remove the thing that slowly brings the idle down in order for the air bowl to seal. The air bowl stud on the stock carb did not fit the Pony; I had to use a bolt for the Pony.
- Im experiencing a stumble under acceleration at low RPM.
These are a few things Ive found out after driving with the Pony carb for several weeks.
- I was turning the choke off too soon. Im now leaving the choke out a little until the engine is completely warm.
- I determined that my vacuum advance was not working and needed to be replaced. I had a vacuum leak at my EGR valve so I fabricated a plate for it and removed the EGR. I would recommend blocking off the EGR the same time you swap to the Pony.
- The Accelerator Pump on the Pony Carb is not functioning. This is most likely the reason for the stumble I am experiencing. I will be buying a rebuild kit in order to correct this problem.
Overall I am very happy with the Pony carburetor and glad I made the swap. The Pony has definitely given the engine more HP over the stock carb. The swap was not very hard and can be done in less than a day. If anyone decides to try this swap and would like further information feel free to contact me.
08/11/10 15:19