 with Larry Harris additional pictures Chris Meredith
 Looking to add a full interior Sport – Cage to my Samurai I wanted to install something that was well built and functional. My search for a product that would fit my needs lead me to Petroworks Off-Road Products. In talking with Gary Munck I was informed this is not a safety device and it should not be used as a substitute for reasonable use of your Samurai. Understanding what this product was designed for, and the quality in its manufacture, I bought one! In know that the instructions tell me it is not a “safety device” but I can tell you it is one heck of a lot stronger then the stock bar. I have no doubt it will serve my needs very well and it will protect my head if I do put Grouche to sleep on his side!
This project took about 8 hours from start to finish including painting the bare metal finish of the Sport – Cage when it arrived to my door.
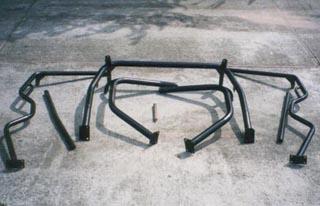
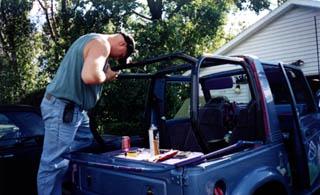
Installation: Tools and Materials When the Sport – Cage arrives at your front door the UPS person will be glad to get rid of it. Packing is ingenious but it is heavy. It comes in a big circle wrapped in plastic and carpet. Unpack your prize taking care to verify all the serial numbers that are stamped into the ends off all sections. Make sure you have your hammer, large tip phillips screw driver, and you impact driver with a # 2 tip. Remember we are working with the infamous Samurai screws. 1 – Main Bar 2 – Front Doublers 1 – Right Front Leg 2 – Rear Doublers 1 – Left Front Leg 34 – 3/8 Washers 1 – Front Brace (bend in middle) 24 – 3/8 Nylock Nuts 1- Right Rear Leg 2 – 3/8 x 3/4 Bolts 1 – Left Rear Leg 16 – 3/8×11/4 Bolts 1 – Rear Brace 6 – 3/8 x 2 Bolts 1 Grab-Bar 2 – 3/8×2 1/2 Bolts  Remove top.
 Remove the bolts that secure the targa, but do not remove targa.
 Remove the round windshield braces.
  Disconnect the outer windshield braces from the windshield.
  Remove the stock roll bar.
  Slip the new main bar into place, slightly lifting the targa. Slip the front legs into the main bar.
 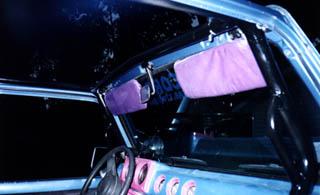 Slip the front cross bar ( the one with the bend in the middle) into the front legs.
  Use (4) 3/8 x 2″ bolts and nylock nuts (included) to assemble the front part of the cage. Note: Do not tighten the bolts and nuts at this time. Do not use washers. Put the bolts in from the bottom – the nuts on the top. Note: For one time in my life I actually took time to read the instructions. This was a good thing. A bad thing… I did not follow them very well. When they tell you to install the mid section then the front legs and do not bolt it down until you are done installing all the sections, believe them. I got to do it twice 😉
The instructions that ship with this kit are very comprehensive. One area that was not discussed in the instructions for my 87 Samurai was what to do with the stock grab bar. I found it gets in the way of the passenger front leg if it is left in place. After removing it with a #12mm socket through the glove box the front leg falls right into place.
 Slip the rear legs into the main bar.
 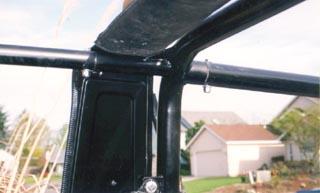 Slip the rear brace onto the main bar.
  Use (2) 3/8 x 2 and (2) 3/8 x 2 1/2 bolts and nylock nuts to assemble the rear part of the cage. Install per note in # 9
 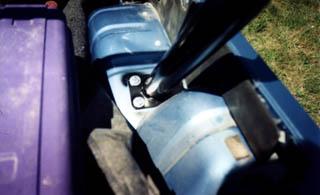 Bolt in the bottom of main bar using the original (8) bolts. Use 3/8 x 3/4 bolt and washer to attach seat belt brace to main bar.
 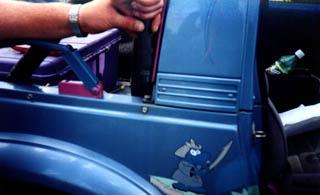 Replace bolts in targa. Tighten all the bolts in the targa and the (8) bolts that attach the main bar. Tighten the seat belt brace bolts.
  Position front and rear legs and tighten all the bolts. Drill (8) 3/8 holes through the floor pain in front using the plates at the bottom of the legs as a template. Use 3/8 x 1 1/4 bolts and nylock nuts, washers and doublers. See sketch #1.
  Note: After you drill the first hole place a bolt in the hole so that the leg does not move while you drill the other holes.
 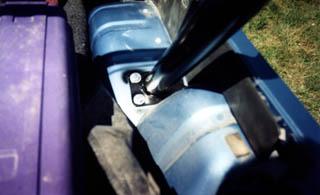 Attach the rear legs the same as step above.
 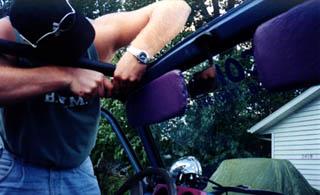 Replace the windshield braces. Recheck all bolts to be sure they are tight.
 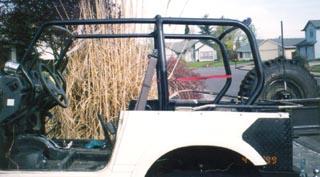 Place the warning labels onto the front brace where it is visible to the front seat passenger and driver. Place the other warning label onto the main bar so that it is visible to the rear seat passengers.
08/11/10 14:58