 IPF Head Lamp Install with Larry Harris
Tired of being in the dark? I was and I knew someone had to have the cure. A little web search tuned up IPF. They are a well known source for supplying automotive lighting. If anyone could help me to see the light I knew it was to be them. Next problem, where to get them. New web search turned up Rocky Road Outfitters. I am off to their web site to check out the information on the IPF head Lamps. Knowing they have them in stock I give them a call to place an order. With tons of information under my belt, lamps on order I felt this is a no brainer to improved night vision.
Short time latter and the UPS person is at the door with my order. We are off on the second step to seeing the light. This is a very easy modification. You only need a few hand tools, bet it could all be done with a phillips screw driver! There are a lot of plastic parts we are going to be dealing with, be gentle. One other tip before we get into the meat of this modification. Get a can of WD – 40 or other penetrate. You will thank me if you do. You may curse me if you don’t.
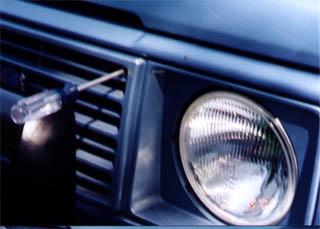 Remove the six phillips screws that hold the plastic grill in place.
  Pull out on the center of the grill. There are four plastic pins. Two at each fender. Note the adjuster slots cut into the grill. You will need to know where they are in the last step.
  Remember that WD – 40? Spray the heck out of the three screws that hold on the trim ring. Go back in the house tell the better half how much you love them, or is that how much you need that new widget? Enjoy lunch, now head back out to the zook.
  Loosen the three screws that hold the ring in place. Do not remove them! Do not disturb the two adjusting screws. They are located top and inward. With a screw loose rotate the ring, hold the lamp and pull both toward you. Remove the wiring harness from the old lamp.
 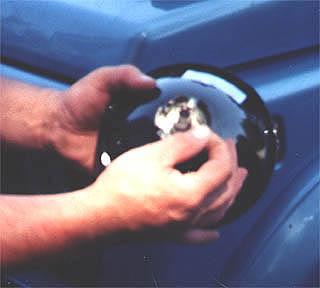 Install the bulb into the head light assembly. Be sure to note the top marked on the light. Do not touch the glass part of the bulb. This will cause premature failure. Too late? Not to worry. Clean it with alcohol immediately. Beer does not count.
 The word “Top” on the sealing boot should be positioned upward. Push the sealing boot hard enough to hook in the flanged part of the socket of the lamp unit. It is important to get this right. If not water will get in and damage the bulb.
 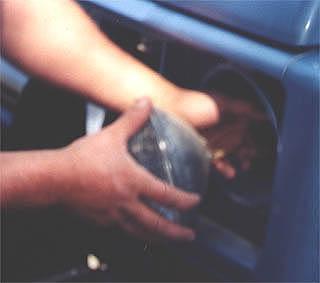 Now that we have it all together it is time to install the new head light. Recover the harness from the depths of the engine compartment. If like mine it fell to the hardest to reach area. It is three prong so it is zook owner proof. Install the light and ring. Turn the ring to hold the light in place tighten the screws and reinstall all the bits you removed to gain access.
  I have left the grill off to show the location of the two adjusting screws. Time to head back into the house to wait until dark. This is the best time for head light aiming.
The best method to align the lights is to take the truck to a shop. I know most of us would rather try it ourselves first so I will cover a very basic basic method.
 Aiming is important! Before aiming:
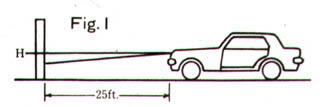
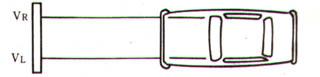
1. Park the vehicle on a flat level surface 25 ft. away from a wall. (Figure 1) 2. Leave all normal loads in the truck. 3. Full gas tank. 4. Equalize tie pressure.
 When aiming the low beam the edge of the beam should be 3 inches below the horizontal and center. This will depend on where you live. This is for us that drive on the right side lanes.
 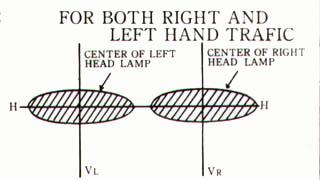 You only need adjust the low beam. The high beam will follow this adjustment.
08/11/10 15:03