 with Bob Norman and assistance by my father-in-law,” Mr. Anonymous”
Part 7: Project Near Completion
More painting and finishing touches! Once the wheels got turning, everything just started to fall into place. The painting went much easier than anticipated, and also turned out pretty good (if I do say so myself) even though I was assisted by a die hard Jeeper, my father-in-law.
My revised goal was to have the rig ready for my club’s annual Spring Fling run at the end of April to the Badlands Off-Road Park in Attica, IN. I am proud to say I made it!
Follow along below and see what it took to get this to a usable state….
After painting all the jams and trim, those areas get masked off for painting the main panels. The panels got scuffed with Scotch-Brite pads, then cleaned and dust removed with tack cloths. 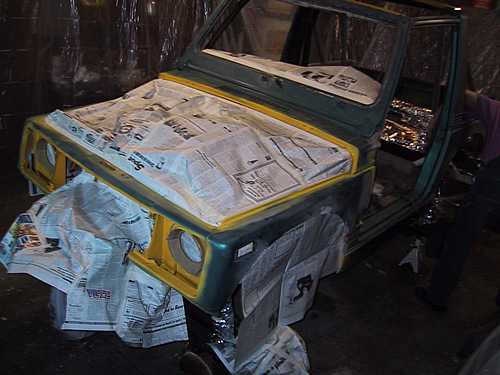
My father in law had this brilliant idea for masking the hard to wrap areas… use aluminum foil. We wrapped the suspension parts with it. It was much easier than trying to use paper. Again, we coated many areas with WD-40 to prevent over spray from sticking. I applied 3 coats of primer, then scuffed afterward to get a good surface for the paint to stick to. I avoided priming directly to the trim painted areas, I’ll just shoot the color coat there to prevent to much buildup. 
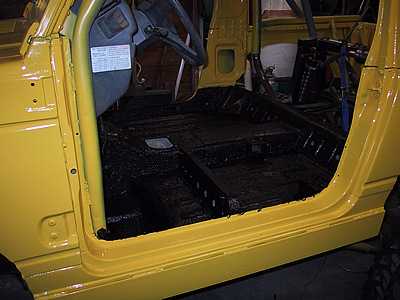
 You can see the aluminum foil here on the rear shock towers. Nearly everything got primed, even the cage, even though it will be painted black. 2 people+8 hours= yellow truck. The paint laid down beautifully with only one minor sag. I sprayed 3 heavy coats onto the body. There was some over spray past the paper, but most of it seemed to wipe right of because the misting of WD-40 prevented it from sticking well.
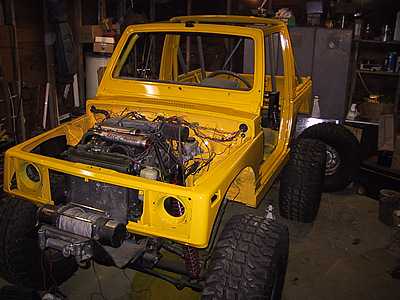
I even painted the interior, but avoided spraying directly onto the cage. The hood is not on at this time, but one did get cut and sprayed black for temporary use.
Next, a trip to the local K-Mart going out of business sale netted me a gallon of Herculiner and that got applied to the inside. Be careful using this stuff, it is very messy and the fumes are as bad or worse than the paint! Definitely use outside, and a respirator is a good idea. It hardened to a “pebbly” coat in about 6 hours in a heated garage.

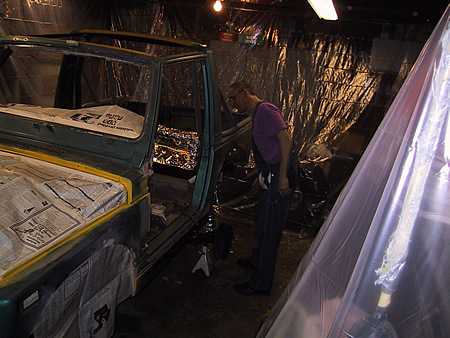
Now, to finish the wiring. First I wanted to make sure everything ran before I cut and moved some wiring. What a mess, but it cleaned up easy. The ECM is mounted up high, behind and above the glove box now. Some things are done that aren’t pictured here. I installed a new windshield from Roadless Gear. It was fairly easy, once I figured out the new piece was 1/8″ larger that the old one. I cut it down to the same size and it made life easy. Also, RCI seats were installed following the instructions here. It was fairly easy also, but keep in mind the mounting holes on the bottom of the seats are not consistent or symmetric, so measure twice! A nice coat of Rust-Oleum was brushed onto the cage (masking this was way too time consuming) and big-truck lights mounted into the tailgate, using a trailer wire converter to allow only 2 lights. I also put padding onto the cage, purchased through Summit Racing. CB, fire extinguisher, first aid kit, tow points and other safety requirements were also added. Well, here it is. My local club has inspection required before going on any club 4 wheeling trips, so we loaded it up and took it to the meeting. The spare tire mounting is a bit difficult to see around, so mirrors will be a necessity. There isn’t really another good place to put it, so I have to live with it.
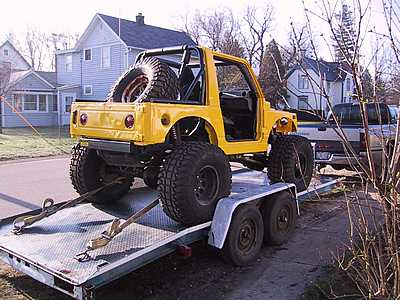

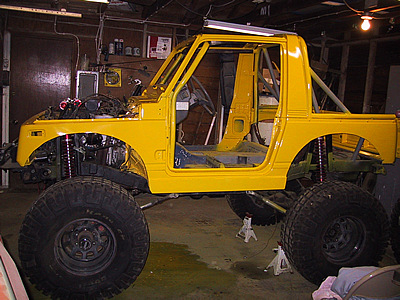
Another view, from the front. Here you can see the seats with yellow inserts (ya gotta be fashionable on the trail!) and the shiny new windshield. I was still being lazy at this time and hadn’t bolted the hood on yet. It makes my Audi look small back there! So, off to the meeting we go. One thing we also do is ramp competition at the meeting. I used it as an opportunity to check for rubbing at full flex. I was sad to see that my tires still touched my fenders at full flex, so a little more chopping was in order.

So, still to come is the first trip on the New Bee! See ya next time!
08/11/10 14:51