


 We then assembled the axle housing end using the alternative tabs that Spidertrax supplied for attaching it to the Sidewinder housing. This is where you would use the standard brackets shown earlier to attach directly to the stock axle tube. This bar puts quite a bit of stress on the axle tube. I don’t think we have to worry about that on this Spidertrax Sidewinder axle housing, but a stock housing should be strengthened with good gussets before jumping on the skinny pedal. The bracket for the stock axle has plenty of meat to grab onto (almost 180 degrees – or half way around the axle tube), but the axle housing itself could twist without additional strengthening.
 This vehicle is a 92 Samurai, and in the newer models, Suzuki had installed round tie-down brackets on the frame. This would be in the way if we had to make any placement adjustments before welding. Our ‘perfect’ location was closer forward than the bracket would allow.
 So a bracket adjustment was needed. Once welded in place, this bracket will still retain all the strength of the original.

 Here are a few shots of the adjusted side plate and how we secured it to the frame.


 After all welding and cleanup was done, the area was primed and then sealed using a spray-on undercoating. The ends of the cross member can be capped if you prefer, we just left ours open as the kit was designed.
 The system is simple in design and allows for quite a bit of articulation. Before the kit was installed, the vehicle would ‘lunge’ forward in a slow rolling idle as the drive train would turn (wrapping the springs) and then the springs would unload moving the vehicle forward. Then the process started again. The rear of the vehicle would also squat under hard acceleration from a stop. The kit installation resulted in a nice even launch and an end to the ‘lunge’.
 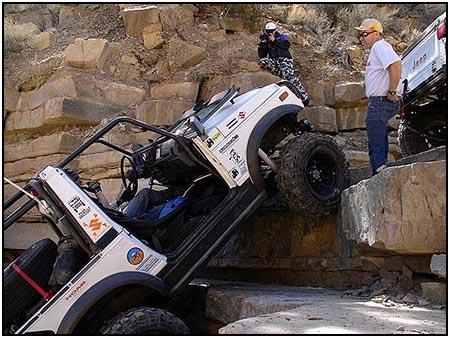 Component Source:
Spidertrax 11755-B North 75th Street Longmont, CO 80503 Sales: (800) 286-0898 Fax: (720) 294-9950 E-mail: sales@spidertrax.com
08/11/10 15:24:14
[tech/footer.htm]