
Sidewinder with a ‘Kick’!Project Sidewinder/ARB part 1with Bill Johnston
 Tired of bending axles? Yup. Tired of being ‘careful’ when welding components onto the thin Samurai axle housing? Yup. Do you ‘have to’ go to Toyota axles to get something a little stronger? Nope! This series will show you how we put together a beefy replacement that is stronger, gives more ground clearance, and makes towing a breeze. We will start with a Sidewinder Full Floater Rear Axle from Spidertrax and then outfit it with disc brakes and the larger Sidekick differential stuffed with 5.12 gears.
Next we will show how we installed an ARB Air Locker in the Sidekick third member. Then we follow it up with a conversion article to show how we pulled the Samurai Rear ARB out of the old rear axle and installed it in the front axle with a matching set of 5.12 gears. Cool eh?  We start with a basically stock rear Samurai axle seen on the left. There is a pumpkin cap welded to this one to keep all the fluid safe, but we won’t need one on the new Sidewinder…
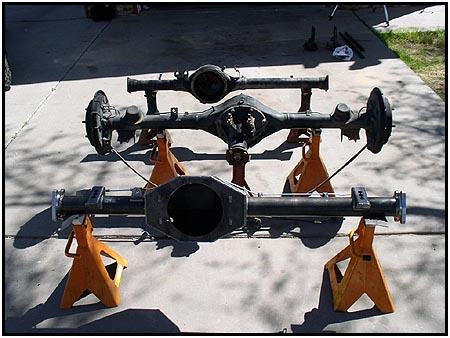 On the right you can see Sidewinder in front, the donor Sidekick rear axle in the center and the little Samurai axle in back. The Sidewinder can be ordered in stock length, 3″ over and 6″ over. So if the Sidewinder looks a little larger that normal, that is because this one was ordered in the ‘3″ over’ stock length. We were already running 1″ wheel spacers, so the added length only moved the tires out a 1/2″ wider on each side.
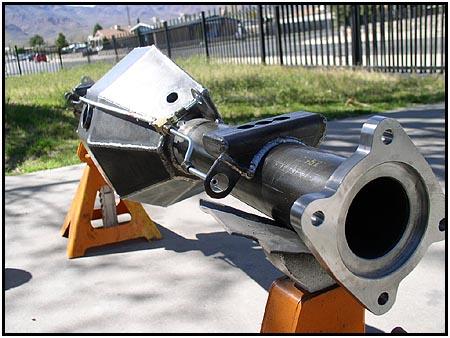
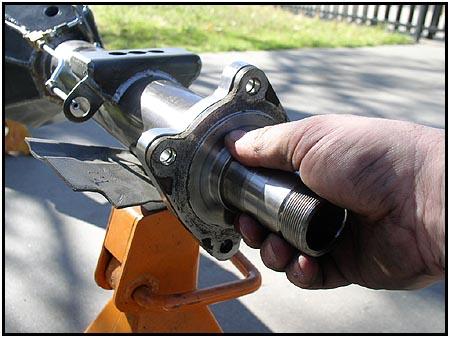
 Here you can see some of the details that make the Sidewinder the brute that it is. On the left you can see the inner oil seal already installed. The large outer ring you see surrounding the seal is where you can see how thick the axle tube really is… that is 1/4″ wall tube steel.
 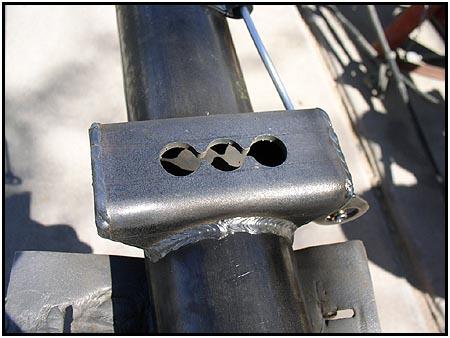 Spidertrax says you shouldn’t need any kind of external gusseting with this kind of strength.
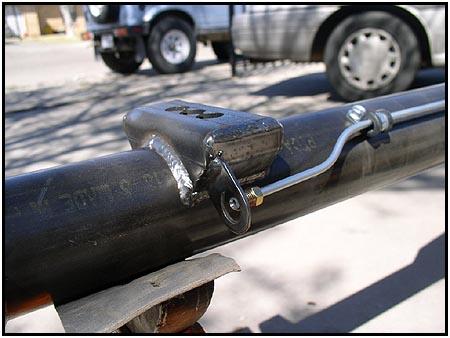
The spring perches can be welded directly to the axle housing with no fear of doing any damage. The Spidertrax perches have three positions for mounting the springs. This helps if you want to move the position of the axle.
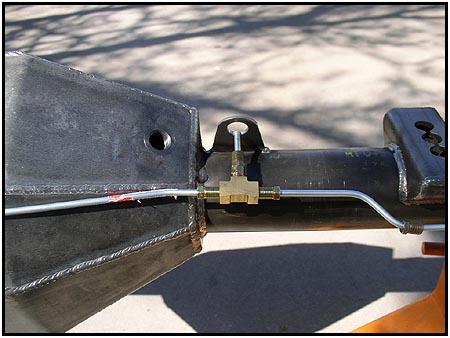
 On the left you can see the vent opening where we will install a vent tube later. You can also see the brake line mounts in both photos. You won’t have to worry about the lines getting in the way with these in place. Pre-installed brake lines are a really nice option when ordering. It will save you the trouble of messing with them later.
 The mounting flange looks a bit different from the stock housing seen on the left. Not only is it much beefier, it has a different bolt pattern. Why? because this way you can bolt on the disc brakes without an adapter plate! This axle is a Full Floater, so that means the weight of the vehicle is on the axle tube instead of the axle shaft. If you break an axle shaft, you can remove it without removing the tire, brakes, etc.
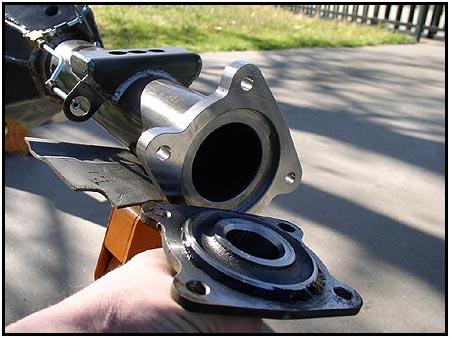
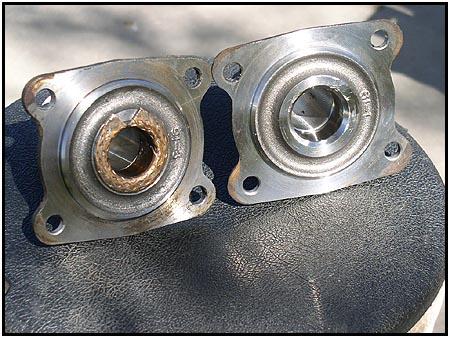
 To allow this to happen, we use components from a Samurai front axle. In the above right photo you can see where we had to remove the brass inner sleeve from the front spindle so that the larger axle shaft can fit through. Sealing the spindle with a little RTV will help keep everything water tight.
08/11/2010