 with Brian Alley
Power Steering Adapted From A 91 Chevy S-10
MOUNTING THE STEERING BOX
After the pulley was finished, and the customer vehicles parts arrived it was back to work on paying jobs.
The next step was to mount the steering box. I spent about a week off and on looking at it before even starting this project, and doing some reading on the internet on other steering box installs. Seems the consensus is that the box I am going to use will not fit in the frame of the samurai. Most conversions I found used a toyota celica box, or one from an FJ type landcruiser that mounts on the outside of the frame. those just were not an option for me. Once decided it would fit, somehow, I went to work.
Using the mounting sleeves I had made up before, I removed the old box and set the new one up in roughly the position I planned to mount it.


Here are the two boxes laying on the floor. Big difference between them in size, but it will fit.


Here is the box, sitting in position with the mounting sleeves tacked in. First I mounted the top forward most sleeve, a notch was cut from the frame to fit it partway down into the frame rail. Then the box was set in place and snugged up against this sleeve. Next the lower forward sleeve notch was cut and it was tacked in. then the rearmost mount hole was marked. I had previously measured the distance from each of the other holes to this one, and using a caliper I marked out on the frame a couple of arcs from the first two holes. Where these two arcs cross is the center point for the third hole. It was drilled out thru both sides 1″ in diameter and the sleeve pushed thru and tacked in place.
Once everything looked good, I pulled the box back out and welded out the sleeve to frame.
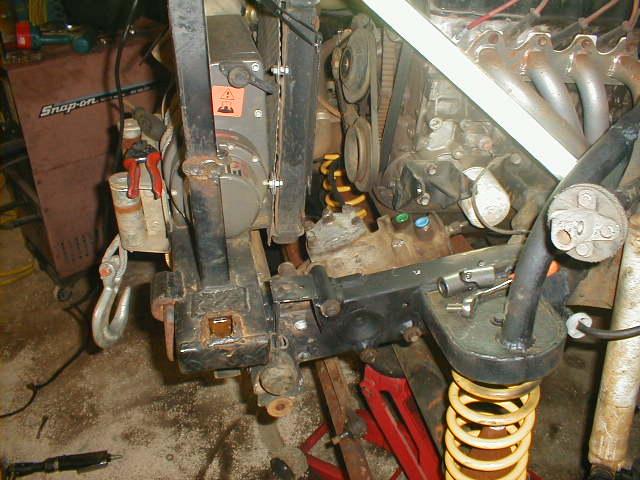

 Three shots of the box in its final living quarters. You can also see the factory A/C bracket in place. All that was needed to use it was to open the rear mounting hole that the old A/C comp used up to 7/16″. No other modification was needed to it.
Here is the most costly part of the project. I had misplaced the factory coupling for the steering box, plus I didn’t really want a rag joint in there anyway. I bought a 3/4″Splined to 3/4″ smooth u-joint coupling from the dirt track racing shop. I did not really count the cost of this into the conversion, because I sold the factory A/C comp and hose setup for a few dollars more than the u-joint cost.
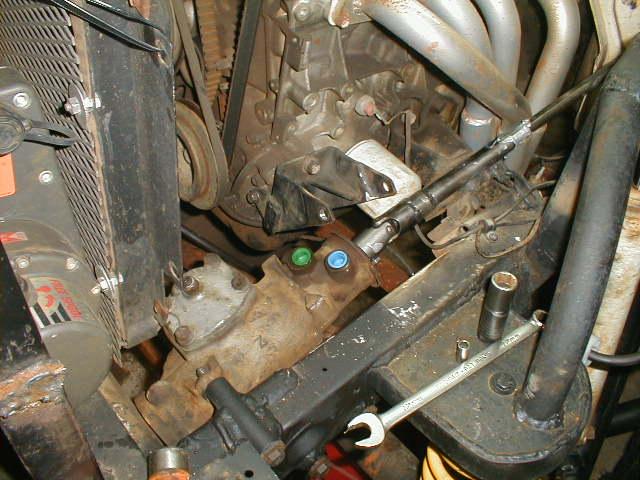
Yes, if you look close it is a tight fit past the oil filter and engine mount. I am certain the filter will not come off without moving the shaft out of the way. But it is no big deal for the yearly or so oil change the trail rig gets. i knew starting out it was going to be close, and am prepared to make an oil filter adapter/relocation unit if need be.


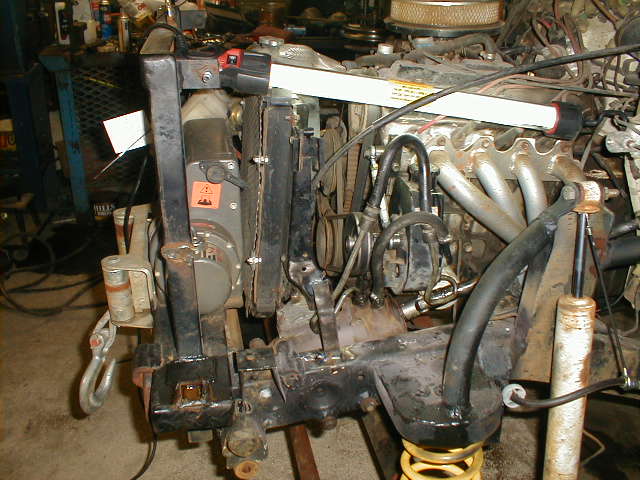
The pump is mounted, and the stock Samurai A/C belt is fitted up. Yes, I used the stock belt, makes it easy to remember what the number is when a replacement is needed.
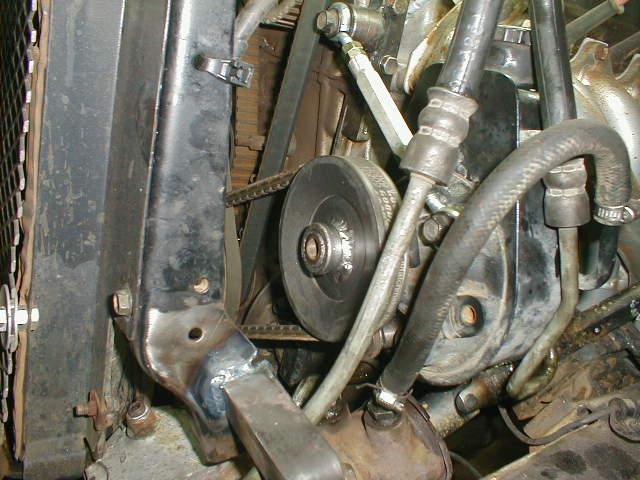
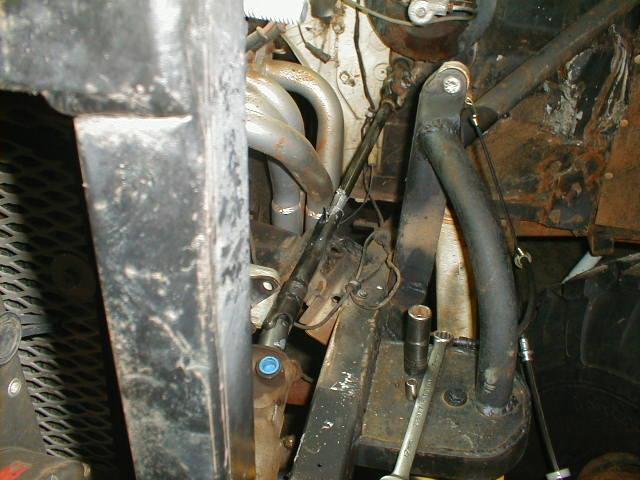
The box, mounted and the belt tensioned. I purchased the small turnbuckle from the hardware store, cost was $3.47. It was so much easier to do than setup the lathe to singlepoint thread the small internal right and left hand thread. You can just make out the mount for the turnbuckle in the second pic. the bracket mounts to the two bolts on the cylinder head, and is threaded to accept a bolt that was originally used to mount the pump to the 4.3L bracket. The stock 91 S-10 hoses were used, just slight tweaking of the high pressure hose was need. Cut off and shorten the return hose and they fit fine. Also note in the lower left corner of the second pic is the rerouting of the lower part of the radiator support. The corner of the radiator was moved slightly forward to make room for the top cover of the box.
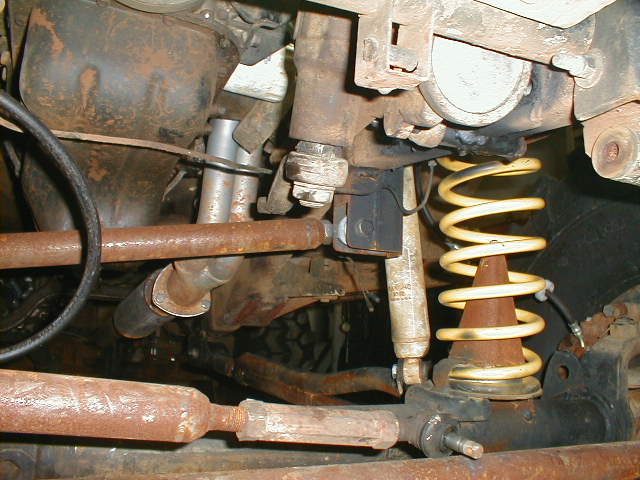
Here is the underside. amazingly the stock Samurai tierod end is a match for the taper in the pitman arm.
So, there it is in a nutshell. How to fit full size GM steering parts on your Samurai Any questions you can email me, I will try to respond as quickly as I can.
Brian.
08/11/10 15:20