 with Bob Norman, assisted by Alex Maslo
Part 3… ZookiMelt or Bust!
So, where did we leave off??? I picked up the “new” body from Rod’s Used Samurai Parts in Iowa. The body cutting and preparation for paint are taking a lot longer than originally anticipated. I expected to chop a little here, trim a little there, reroute exhaust and stuff and be done.
WRONG!
Follow the grueling process below. It’s amazing how some of the simplest things can become huge projects. I set a goal of getting one good “shake-down” run on the rig before ZookiMelt, leaving myself time to make fine tuning alterations, rather than showing up with a new rig like last year.
I knew from the beginning that if and when I removed the body lift I would have to cut-off and move the front body mounts either to the original locations or to a different location. They were cut off and moved last year to gain clearance for the suspension control arms. I still need the clearance, so looks like they’ll find yet another home, probably on the inside of the frame rail rather than in the stock location outside of the frame.
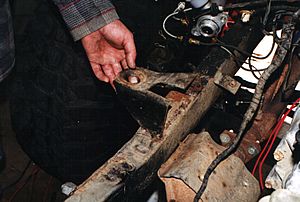

The next item that needed to be altered was the angle iron tranny cross member that I fabricated last year. The front shaft would hit the stock unit at even partial droop, so I cut it and routed this piece over the shaft instead of under. I trimmed about 35% of the height away to still retain the structure of the piece, but to gain as much clearance as possible. This did help, but the angle iron still hit the passenger footwell when the body was placed onto the chassis. 
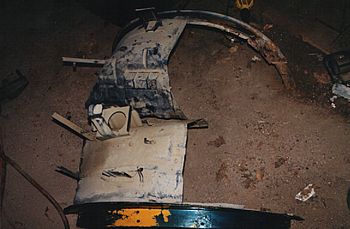
 I cut a U shape into the floor and hinged it upward, then removed some of the curve where the floor turned upward previously… …to allow the new shape to be able to be welded together with minimal additional material required. I didn’t want to add a bunch of patch pieces to the floor and end up with gramma’s quilt. Also, I needed the floor moved up to clear my rubber brake hose as seen in this picture.

These pics are a bit tough to look at, but you can see how much clearance was gained by angling the floor upward in the rear. The black on the under side is from the undercoating burning while welding. This stuff is toxic when burning, so if you get into this situation, please have a mask or fresh air supply, like auto painters use.


Also, no leg room was lost for the passenger since the rear isn’t really used anyway. I did have to weld in one additional piece to make a transition a bit smoother on the right side of the floor.
Since the body was now on and sitting reasonably flat on the chassis, it was time to cut the fenders and quarter panels for tire clearance. I only had limited cutting on the old body, but when I removed the body lift I needed to get more severe with the body saw. The pic on the right shows how much material was removed from the front fenders. Since the fenders are now cut back, I placed them onto the vehicle to mark where the rocker panels and firewall need to be cut.

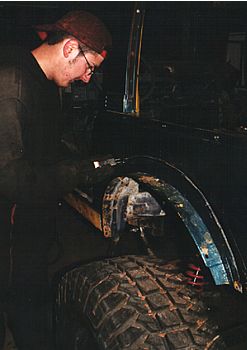
As long as we were chopping away the sheet metal, we moved right back and cut the quarter panels, too. All wheel openings are now a 36″ diameter so there should be no rubbing on the body. Alex is using a pneumatic body saw for this instead of a Sawzall because it is much faster and easier to control. The rear floor was cut out before the tub was placed on the chassis. It had to be done to clear the rear shock mounts. This shot is looking back from the targa bar after the fenders and floor cuts were roughed in.

 So what next? I need somebody to fabricate me a fiberglass hood or scoop on the hood. The front suspension barely fit under the hood with the body lift, so now I need 3″ more. Any ideas? Mail bob@izook.com for suggestions. Now that the body cutting is getting close, it’s about time to start on the sanding and other prep work for paint. The body will be removed for painting, then put back on permanently and the front body mounts completely welded onto place. Then the RCI seats will be added according to the write up here in iZook after the interior has bedliner material applied. So, till next month…. See Ya
08/11/10 14:52