 with Mike Lewis
‘Kick Seats in a Samurai
 Editors Note – Here at iZook, we are always looking for a new approach at an old problem. Mike Lewis sent in this installation ‘How-to’ for folks that want to put Sidekick (or Tracker) seats into their Samurai. If you have access to welding equipment, this is an extremely easy conversion to complete. We verified this by using Mikes technique to install ‘Kick seats in one of our project trucks. It only took 3 hours from start to finish. And much of that was to let the metal cool and the paint dry! Select the articles from the left side of the page.
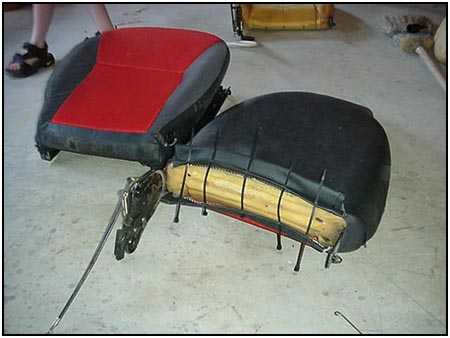
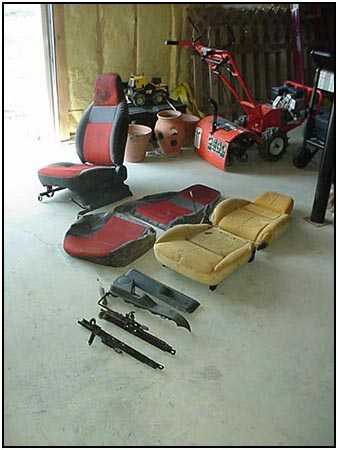 Taking the seats apart made the fabbing and cleaning so much easier. I cut the legs short on the tall side with a cut-off wheel using 2″ masking tape wrapped around the unit as a guide.
2″ masking tape was wrapped all the way around the base of the Sidekick seat frame in equal relation to the frame to mark where to cut the long legs of the seat; The short legs were kept at their original height. I retained the Samurais spacer on the passenger side to make it even with the drivers side, which has the welded-in seat brackets. The 1.5″ angle iron I welded to the Sidekick legs was necessary because the Samurai rails are farther apart than the Sidekick legs; it gave me about a half inch of overlap on each side, which is just barely enough, and more places to weld.
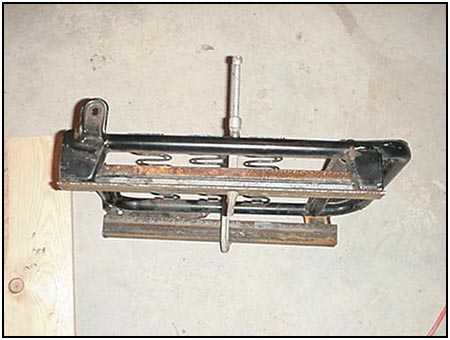 The angle iron was welded to the Kick seat frame to be a firm transition from the frame to the Samurai rails.
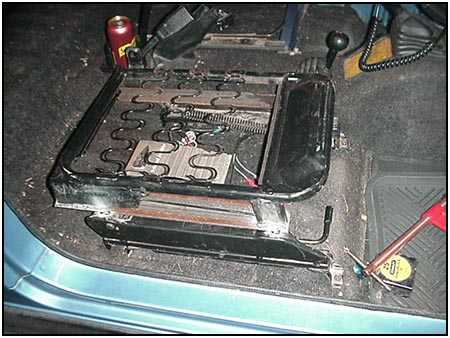 With the Samurai rails installed in the truck, I centered the kick frame/angle iron combo on them then tacked them in place.
 This is the drivers side being tacked in place. I set this back as far as possible to accommodate my legs (Im 64″), which almost got me in trouble – I nearly made it so I couldnt get the rear rail bolts out!
 While I was cutting and welding, the upholstery was in the washing machine. I air-dried it outside. To reinstall the upholstery,
  I used zip ties, which made this step so easy and pulled everything nice and tight. The result was a very professional looking project.
Once the zip ties are zipped, I trimmed the tails, re-attached the back to the seat, and the units were ready to bolt in place.
 This is my dog, Missy, with her face buried in my cup of water as I sat zipping my upholstery back on. Im glad I caught her.
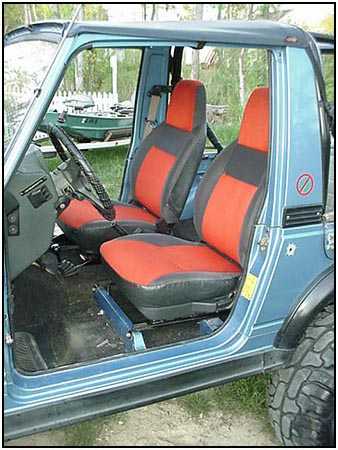
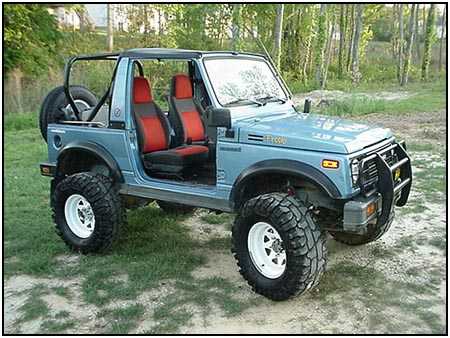
The Finished Product
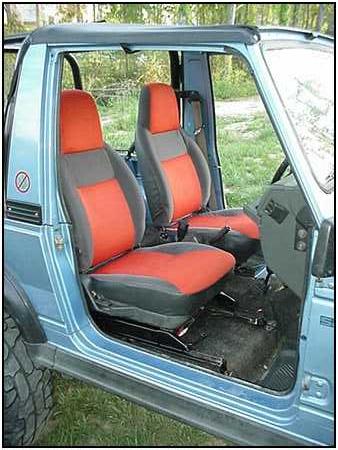
 These seats sit about an inch higher than stock. Being firmer than stock makes a BIG difference. The steering wheel is a reach, so a 14.75″ Grant wheel with a 4″ dish is on order unless a Sidekick wheel will work.
.
08/11/10 15:21