 with Jim Mazzola –
The Elusive Lower Geared Transfer Case
The real work:
 Now comes the work. As you can see in the picture, the gear size difference will necessitate grinding the inside of the case for clearance. Youll need a die grinder, some grinding wax, and a lot of patience. The grinding wax is used to keep the tool from loading up with aluminum. Using the new gear as a reference, slide the gear down the shaft and take note of where it starts to interfere. Mark that spot. Start grinding slowly. Dont be in a hurry at this point. A mistake will be costly. repeat
 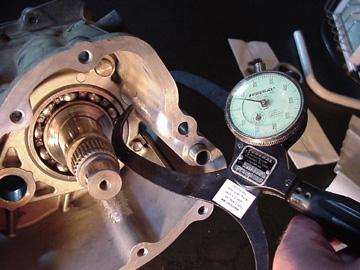 the fit, mark, and grind. Slowly working your way down the case. Do Not try to grind it all at once! At first the gear will only hit in one place. As it goes lower in the case it will start to hit in two places. Continue clearing the case till
 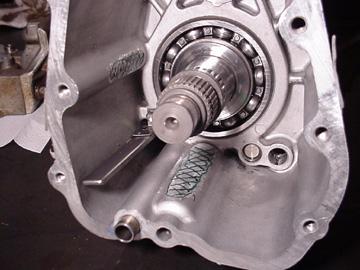 the gear just fits without any real clearance. From here I used a feeler gage and cut the case until I had 0.040 or 1.0 mm clearance between the gear and the case. By using a set of pattern makers thickness checker I was able to still have 0.060 or 1.5 mm of wall thickness after I was done. The gage is a bit tough to read in the photo but take my word on this. The long clearance area is the thinnest one.
After the grinding is done youll see why we opened up the back side of the case. Rinse the case in cleaner and blow it out. Inspect it carefully to be sure all the metal shavings are removed. Especially in the chainset.
Reassembly:
Use your own preference on assembly lubricant. I used engine assembly molykote. The same stuff you use on camshaft lifter interfaces when installing them new. The manual suggests transmission assembly lubricant.
 Putting it back together is pretty much a reverse of how you took it apart. Assemble the new output gear and sleeve bearing, reduction hub with C clip. Remember to line up the marks when reinstalling the hub sliding sleeve. Also be sure the fork is in the sliding sleeve collar and the correct direction when inserting it through the case. Install the new countershaft gear on the countershaft. Dont forget the order and orientation of the locking balls on the thrust washers.
 This is where it gets tricky. When we disassembled the front case, the countershaft was in the case. The input gear came out as part of the front case. Due to the size of the gears now, the front input gear can not pass by the countershaft. The countershaft and input gear and bearing must be assembled to the front case and this whole assembly slowly lowered into the case. This requires more than two hands! Determine the location of the front large snap ring. stack the snap ring, bearing and gear along with the counter shaft gear on top of the front case. All three of these must be pushed together simultaneously. The snap ring needs to be in place but not in the groove. After the parts are all lined up. slowly tap them together with a dead
 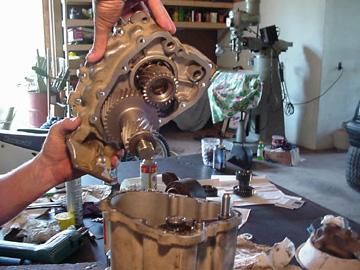 blow hammer or rubber mallet. Once the bearing and gear are seated, you can attach the large snap ring. While your at it, dont forget the front snap ring. It retains the front bearing. Youll need to hold the countergear and the front input gear together and to the front case and then line up the shaft with hole at the bottom of the case. Be careful not to let the thrust washers slip and dislocate the small balls on the shaft. If in doubt, remove the assemble and try inserting it again. I think I did it three or four times before I was sure that everything went together OK.
Use RTV to attach the case halves together. Reassemble the chain side case next. Remember the shim from the back side of the bearing. Use RTV to attach the rear chain case halves together. Dont forget the detent balls and springs. Assemble the transfer case gearshift lever yoke and roll pin. Slide the hat section, ball and spring into the gearshift side housing. Attach the plug.
Reattach the two cases together and attach the gearshift lever case. tighten all bolts to their respective torques.
Reassemble the transmission and transfer case in vehicle.
Dont forget to fill it with oil.
Summing it up:
The whole R&R and transfer case rebuild can be done in a weekend. Total cost of the gearset wasnt cheap, about $1000.00 U.S. including duty to my door. The instructions were on the weak side. The fit, finish and backlash as measured in the case, were all up to factory specs. The sound quality in the transfer case has not increased based upon before and after dB measured levels. Youll have to read the story on my inaugural trip to Tellico to see how the gears performed. The bottom line was 5.125 R&P X 3.65 first gear X (new) 3.79 low range = 71:1 Crawl ratio. Not as low as the 4.16 but a far cry from the original 34:1 it came with.
I would like to thank Jerry Lenstra and Greg Page from GRP Automotive in Australia. Especially Greg in his patience in determining the correct gearset for my vehicle putting up with constant phone calls we exchanged nightly. My phone bill will never be the same! You can find these folks at http://www.rockhopper.com.au
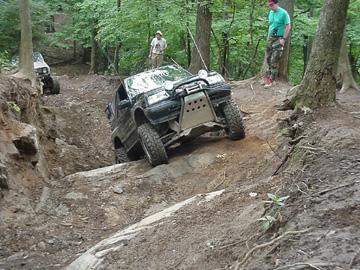
Last step is the most important here: Load vehicle on trailer, take to Upper Tellico OHV area to test drive T.R.E.A.D. Lightly

08/11/10 15:26