 with Brandi Seei
Heater Refresh

 Refreshing a heater is just about the easiest thing that I have done on my Suzuki thus far. (We decided on the term refreshing since rebuilding conjures up visions of machine shops and shiny new parts. All we did is well, read on.)
I actually had my first experience rebuilding Murphs last year and I think I perfected the art this time around. Here we go
It should be noted that the dashboard need to be removed first which has moderate difficulty level keep track of your screws and LABEL EVERY WIRE! We were doing a bed liner and re-paint on my truck so this was a convenient while we were in there project. It also might be worth mentioning that if your truck is equipped with air conditioning there may be additional steps which potentially effect our environment. Please have a professional a/c shop properly empty the air conditioning stuff out before proceeding.
Also, this project is NOT a quick two-hour job, so dont tackle this one if you need your truck to take you to work the next morning just in case it goes more slowly than you anticipate.
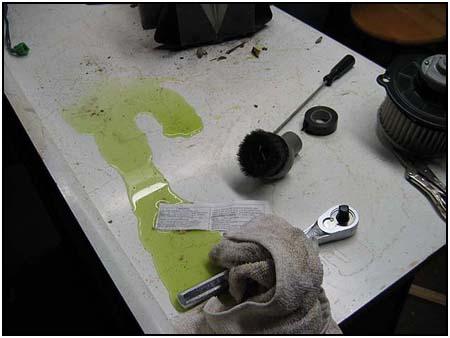 Since you will be working with the cooling system, it may be wise to drain a large portion of the system into a bucket unless you dont mind mopping up the floor when you remove the heater core hoses.
First, lets learn a little about what were getting into.
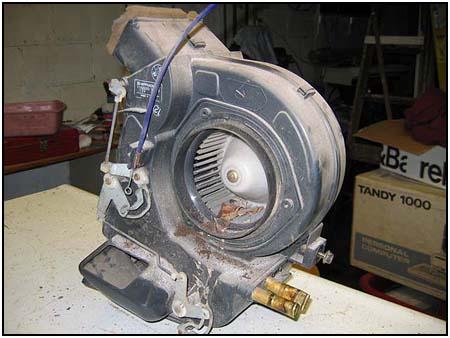
 The heater assembly is a large plastic box filled with little swinging doors, an electric blower motor, and a little baby radiator-like thing called the Heater Core.
The engine heats up antifreeze and swirls it around the engine somehow, probably using magic. At some point it is diverted through rubber hoses to the heater core, which becomes excruciatingly hot. The electric fan sucks cool air through the heater core, warms the air, and blows it out the vents and either onto your feet or out the window if you have it rolled down.
 Just in front of the windshield you will see a vent. This vent was designed by Suzuki as the fresh-air intake for the heater. As an added bonus, however, it also serves as a very effective storage unit for leaves, seeds, blades of grass, and whatever else may be sucked in there over the years. Murphs truck actually had a sapling growing in his.
Which brings us to why we are here: To clean the heater core, maintain and lubricate the inner workings of the heater, and add a bit of a preventative measure to keep things working nicely for years to come. Oh, and to keep warm.
1. Remove the heater from the truck. By removing the dashboard you will find some obvious brackets and bolts, however both times doing this we missed one directly behind the heater unit on the engine side of the firewall which caused us to say several dirty words.
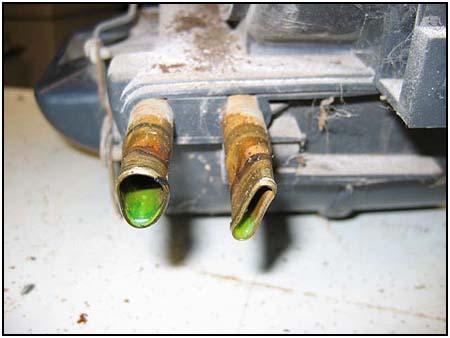 2. Disconnect the two hoses running from the engine to the heater core and back again. The hoses will be very difficult to remove. (On mine we used a hair dryer to soften them after spending about two hours swearing at them first.) I have been told that these hoses are difficult to replace if you cut them so I would not recommend that as an option. The hoses are also attached to copper tubes which will crush if you squeeze them too hard, so dont do that either.
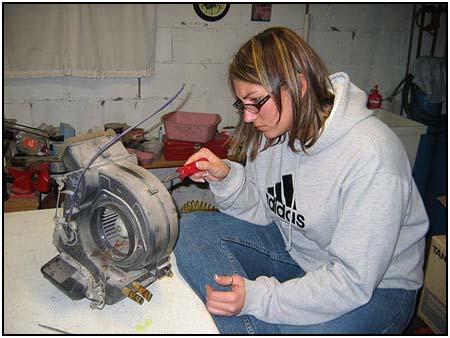
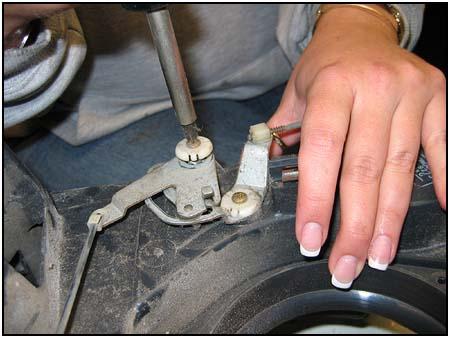
3. Follow each of the cables from the heater controls to where they mount to the heater assembly you will see they are attached by little metal clips just use a wide flathead screwdriver to open the teeth a little bit, and the cable should slide right out. Using a sharpie, write on the switches the color of the cable.
4. Remove the electrical plug (usually blue and/or green) from the wiring harness to the electrical fan. (you may have already done this when removing the dashboard.)
5. Remove all the plastic ductwork from the dashboard and give them a good cleaning when you clean everything else youd be surprised what will find its way into the vents over the years. We found matches, a pen, some crayons, several pennies, and a tire pressure gauge.
 There! The heater assembly is now ready for some reworking. Find a nice flat surface, such as your workbench or the dining room table, a cold drink, and read on!
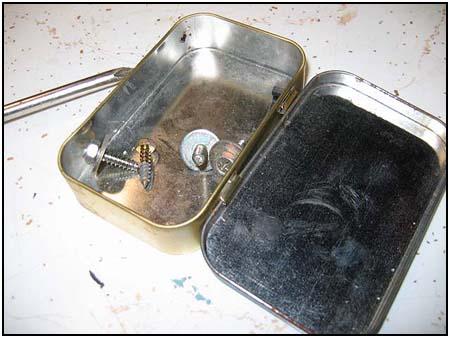
6. I recommend having a container of some sort to hold all small parts as there will be many.
 7. Remove all clips from around the edges of the heater as shown in the picture with a flat head screwdriver.
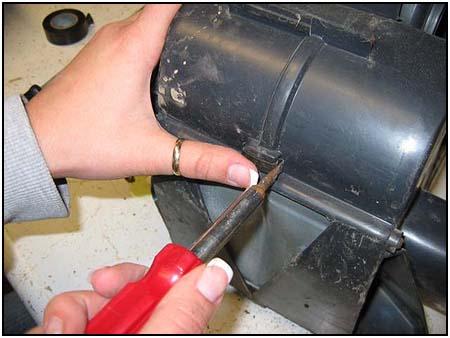 Seasoned Rookie Sez: Put your hand over the clips as you remove them lest you crawl around on the floor looking for them!
8. Remove all screws — There will be quite a few. If it doesnt come apart easily you probably missed a screw somewhere.
 9. When you have the halves separated, you will see several swinging doors and other mysterious parts. You need to remove all the little metal moving parts. Place them in the container with the screws.
Seasoned Rookie Sez: Youll see a lot of mostly deteriorated foam insulation in various places. Dont worry about replacing it. When we reworked my heater last year we went to great trouble to buy self-adhesive weather tripping and replaced it all. Not only did it create a nightmare fitting everything together without pushing it off, but it really didnt make much different when it came to heat output since everything fits pretty tightly to begin with.
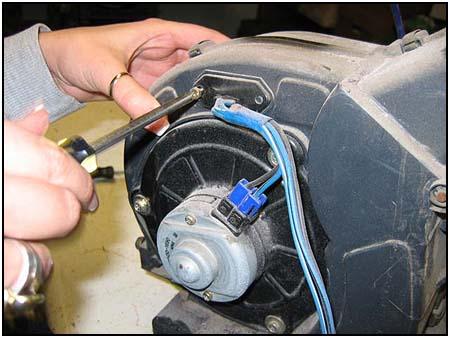
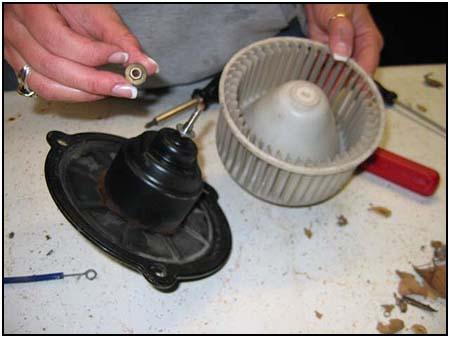
10. Remove the electric motor assembly from the casing by removing the three screws. Make sure to note the position of the electric plug the thing will fit in there in any of three positions, but the wire is just long enough for the correct way. Save trouble now, use a sharpie and make some markings to show how to put it in just right.
 11. Just above the electric motor is a very odd little thing, it has a springy coil on the inside, it appears to be some sort of temperature sensor. Neither of us have any idea what this thing does, it might be for air conditioning or some sort of secret government conspiracy transmitter. Just be careful with it in case its important.
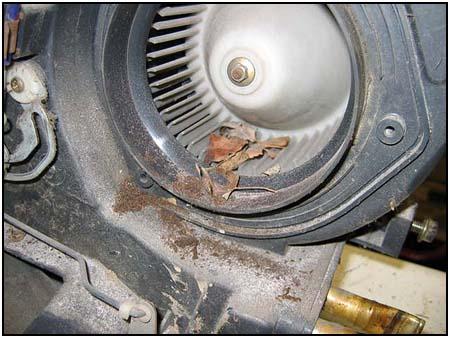
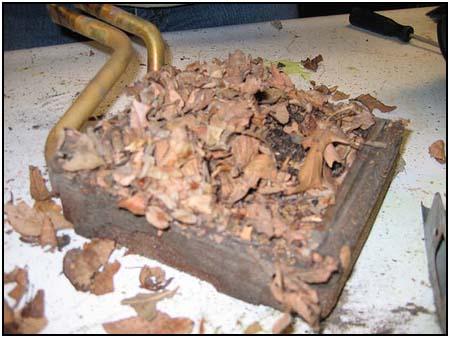
 12. You will see a squarish shaped part that has the 2 copper tubes coming off the top of it. This is the heater core we discussed earlier. You may not see it right away because it is acting as a tropical rain forest sanctuary. Remove this part carefully as you do not want to bend the little thin metal accordion looking thingys.
Seasoned Rookie Sez: When you pull the heater core out, moldy leaves and other things will go everywhere. Keep your workbench clean and put one of your significant others nice white shirts underneath to keep your workbench clean as a whistle!
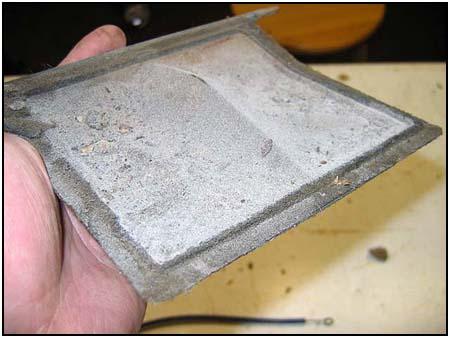
13. Clean all of the plastic pieces using your favorite cleaner. I filled the basement sink with warm water and poured in some Simple Green. Using some old toothbrushes and plenty of rags made this an easy job.
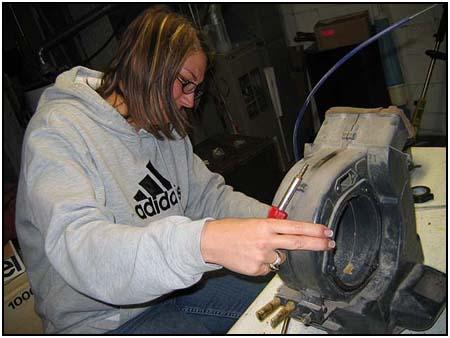
 14. The best way I found to clean the square metal part (heater core) was using the garden hose outside with a high-pressure nozzle. If yours is anything like mine there will be a seventeen years worth of leaf and tree particles stuck in there.
 15. I put the hose on the highest pressure setting and sprayed only from the bottom (the leaves and such were resting on the top. You dont want to flip the part back and forth because you want to blast them out of one side, not confuse them and make them go back and forth. You want to shoot them out the other side. Also, make sure to spray straight in, not at an angle because the force of the water might bend the little metal thingys. Just be careful. If any of the fins in the heater core were damaged somehow, take a small flat blade screwdriver and carefully bend them back into place.
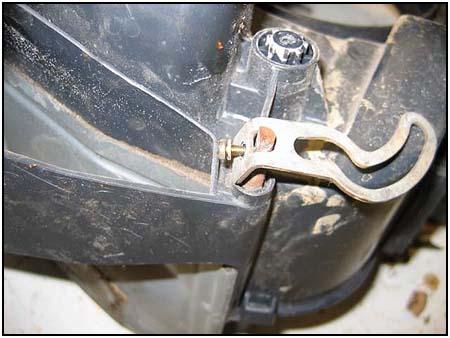
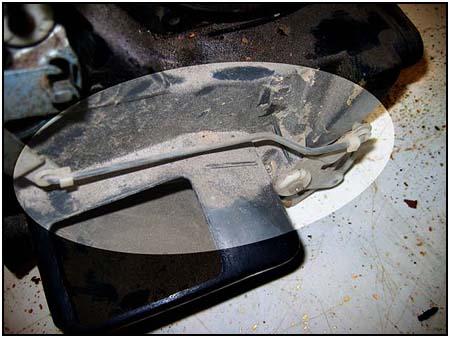
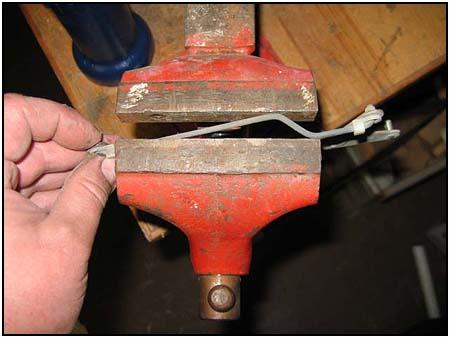
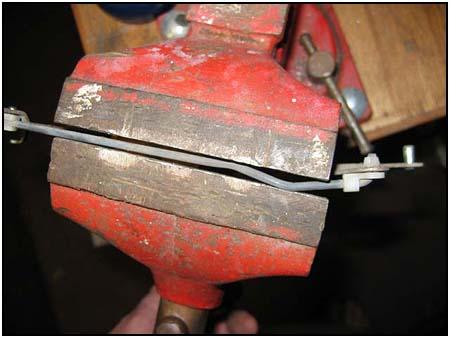
Seasoned Rookie Sez: Heres an easy little adjustment you can make to help your defroster work a bit better. There is a link which is sort of curvy-shaped which prevents the floor-vent from closing all the way, robbing air from the windshield vents. Put the link in a vise and straighten it out until its flat.
 16. The electric fan should be in good shape, however take this opportunity to wipe off the blades and make sure theres nothing caught around the axle which would cause it to spin slower than it should.
Seasoned Rookie Sez: Take a sharpie and write the date and your name on here so the next person can say hey cool. When Brandi wasnt looking I wrote Brandi has a pointed head. I got hit hard for that.
17. Once all parts are clean, start putting the thing back together. Everything should fit back together nicely. If it does not, dont force anything, just move the little parts around until they fit perfectly.
Seasoned Rookie Sez: If it jams, force it. If it breaks, you needed to replace it anyway. Sometimes a ball peen hammer applied liberally can be good stress relief.
 18. Ok, now you are ready to put the little moving parts back together. The key to making the heater controls move smoothly is to grease all of those little parts. We used all-purpose grease but it may be best to use white lithium grease.
19. Put all screws back in and re-attach the little springy clips.
20. This would be a good time to carefully re-shape the heater core ends. (the copper tuby like things.
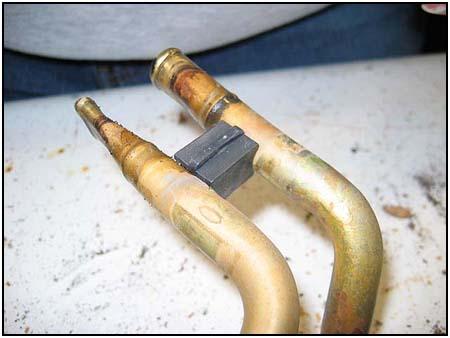 You will know you did it right if you have no parts left over. If you do, you did something wrong. Take it apart and start over again. A popular part around here to forget is the little plastic thing that keeps the copper tubes separated. This seems minor but is INCREDIBLY important. If you leave anything out, something might not work right.
Part two: The Air Box. (By Murph) I did this part while Brandi was doing the tough stuff.
1. Directly under the air vent in front of the windshield, there is another plastic housing which usually separates the air and water from rain, car washing, etc, and also holds lots of leaves. This is held into the body with two nuts loosen them and this part should fall straight down. Disconnect the two rubber hoses first.
2. Make sure the rubber hoses are clear of debris this is where the water drains into the engine bay and not onto your feet.
3. Explore the water separator device and you will soon figure out how it works. Youll see in the corners some square passageways which ARE filled with leaves and such. This part is easily figured out.
4. Go to the hardware store and buy some screen, enough to cover over the whole top of the air separator with maybe an inch hanging over. There has been some debate of aluminum vs fiberglass. I used aluminum on mine last year and it has held up quite well.
5. Using the incredible coordination skills learned while playing videogames, hold the screen up against the inside of the air vent and replace the air separator. You may have to do a practice run first to make sure the mounting bolts arent in the way. Youll figure it out. I have faith in you.
 At the risk of sounding like the Haynes repair manual, Reinstalling the heater assembly is pretty much the opposite of removal. The tricky part again are those hoses. Use a water-based lubricant (it has been suggested that a product called KY jelly is perfect for this application) and be sure to use some fresh hose clamps to prevent leaks
As long as you used a good method for keeping your parts sorted out, reassembly should be quite easy. You will be amazed how much air that little heater can put out once it is clean!
08/11/10 15:00