 Diamond Plate Door Panel Installation with Brent May
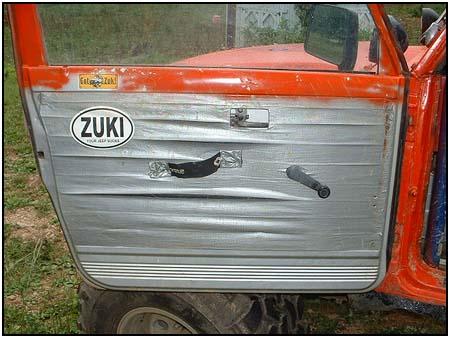
Going from BLA to BLING!! When I had first acquired my beloved Samurai, the stock door panels were in dire need of some improvement and a little protecting. So, being the cheap person that I am, decided a covering of Duct tape would be nice. Duct tape, a wheelers best friend right! Not so much, in this case. Well, after a couple of years of repeated deep water dunkings, mud-hole playing, leaky doors and over all off-road abuse, my duct tape wonders were looking….well, A little worse for wear! (OK, down right UGLY)
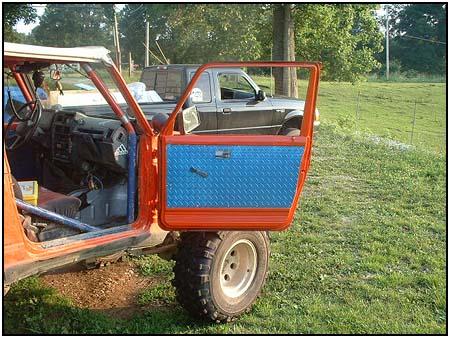
Enter Sean DeVinney, head cheese at Aftermarket 4×4 and his Diamond Plate door panels. I had acquired a set of the Aftermarket 4×4 Diamond Plate door panels and its a good thing too! Its WAY past time for a much needed face lift for my doors. Sean also has ABS Plastic panels as well for those looking for a different option to Diamond Plate.
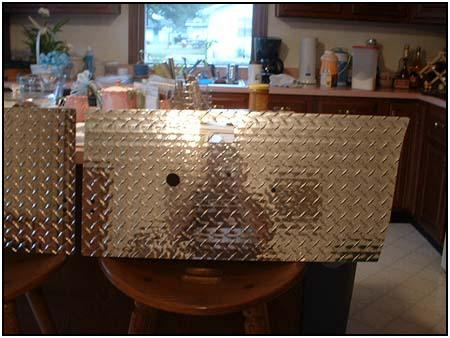
 The panels come in your standard chrome diamond plate, but I opted to paint mine to match my Samurais color theme. This step is totally optional and is not a necessary part of the installation. Speaking of installation, its about as easy as it gets with this kit. All you need are a few basic hand tools (drill, screwdrivers, #2 Phillips driver bit, black RTV silicone) and about a half hour of time. The panels come with a set of self drilling, Phillips head automotive panel screws and detailed installation instructions. (With contact info in case its needed.) The first step is to remove your old panels. You will want to remove all of your hardware such as your window crank, pull handle, and door latch trim panel. (My samurai has most of this missing as you will see in the pictures). When removing the window crank, be careful to not loose the clip that holds the crank in place. I used a thin blade screwdriver to pop the clip out just enough to slide the handle off. The rest of the hardware just screws off the door. Place these items aside to reinstall later.
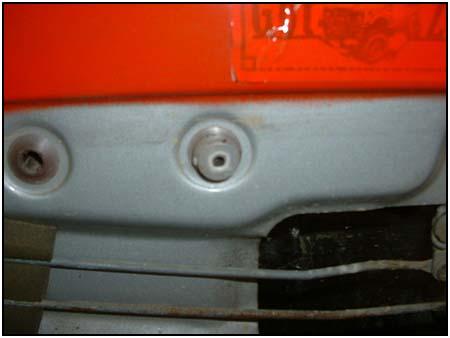 After all that is removed, use your flat head screwdriver to pop the factory panel out of its mounts (or a door panel removal tool if you happed to have one laying around your garage). Be careful to not leave any of these plastic clips on your door. The fiber-board door panels on my samurai were pretty rotten, so these would pull out of the panel and leave themselves attached to my door.
Next, clean your door off really well where your old panel was, and apply a bead of the RTV around the edge of your panel (or door). This will help seal your panel(s) from dirt and debris, as well as keeping them from rattling. Let this set up a little before you install your new panel.
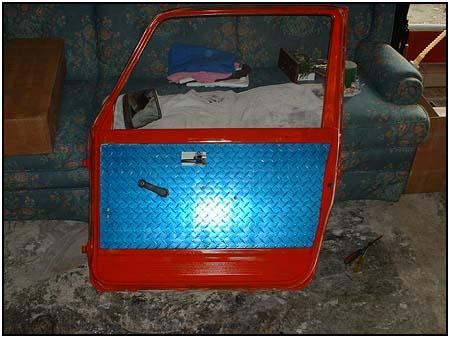
 Next, position your new panel(s) on your door. Make sure everything is lined up properly so that you can re-install all of your factory hardware. This will also help hold your panel(s) in place so that you can install the self-taping screws. Place the screws evenly around the panel(s) to securely hold them to the door. Clean off any excess RTV from your doors and your done!
Repeat these steps for the other door and your all finished, so sit back and enjoy your new Bling! The new Aftermarket 4×4 Diamond Plate panels really make a big difference in the looks department of your doors as well as provide much better protection from the elements than the old stock panels did, not to mention much easier clean up after a hard days wheelin.
08/11/10 15:01:54