Page 2
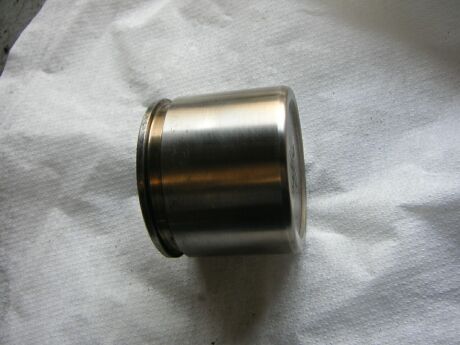
 Yep, not good at all. At first you’d say this piston is beyond repair, but it appeared that a “quick” scrub with a clean Brillo pad was enough to save me a trip to the store.
See? Yes it’s the same one !!
Check it thoroughly for deep scratches or pitting

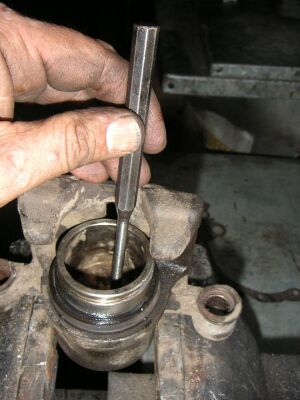
Now it’s time for the inside of the caliper. Carefully pull the rubber collar up to try and find the end of the steel retaining ring that’s holding the collar in the groove. Once you’ve found the beginning, pry it out with the tip of a small screwdriver.
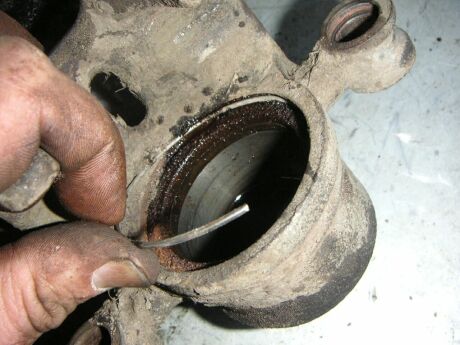
There you go, pull the rubber collar from under the spring and take the spring out. Clean it with the Brillo pad and put it aside, again in a clean rag together with the collar, after you’ve cleaned that with some mild soap and warm water. Now take that trusty old small screwdriver and clean the groove for the spring from all the dirt and rust, so it will seal up nicely when you put it all back together. Give the rubber ring that’s in the caliper for wear or cracks. This one’s important, it’s the ring that slides up with your piston when compressing the brake pedal, giving the piston some friction so it will slide back in place after you release the pedal. If it’s cracked or damaged otherwise you will need to source a replacement.
Clean the inside of the caliper very thoroughly, using only clean rags. Do not take the risk of re-using a rag you’ve used before and risking sand or other dirt to come in the caliper !!

Once everything is cleaned and checked it’s time to put everything back together, starting with the collar and spring. Be sure to check that you’ve got the collar under the spring all the way round. The hardest part being where you can hardly reach it on top of the caliper.
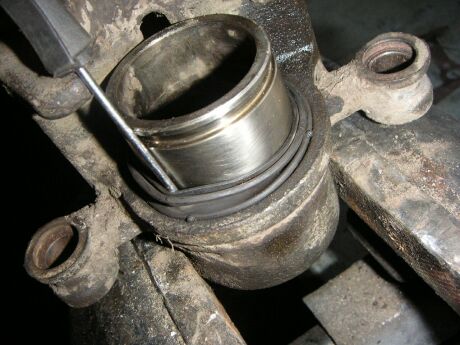 Now comes probably the hardest part of it all: putting the rubber collar around the piston. Again you’ll find that it’s hard to reach that top part of the caliper, where the rubber is almost against the casing of the caliper. I used – again – the tip of a small screwdriver, but I’ve seen people use anything from their fingers to bicycle spokes. As long as you don’t pierce the rubber and you’re sure it’s all the way around it’s okay.
It took me 5 minutes on one side and about 10 seconds on the other side, so be patient.
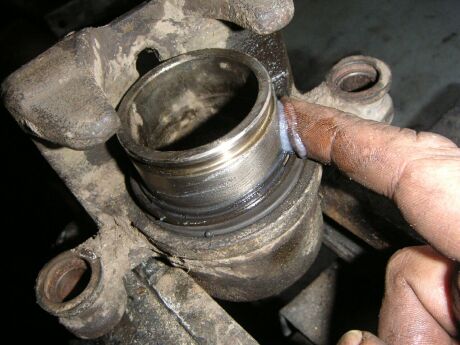
I put a special kind of grease on the caliper so it slides nicely up and down through the rubber and also protects from dirt and water.
Do not use just any grease, this one’s made just for this purpose !
Put the caliper back in the vise (careful, again – do not over tighten it), take the punch you used to tap the piston out and gently tap it back in place. Be sure the piston goes in straight, if not it can get very stuck and you will damage it.
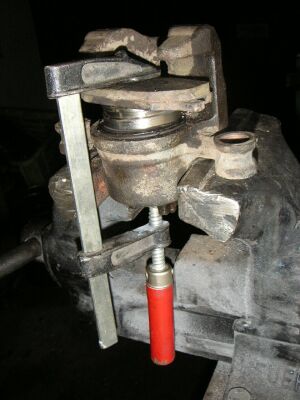
When you’ve got the piston in a couple of millimeters, take one of the old brake pads and a C-clamp ( preferably a bigger one than I used ), put the top end of the clamp on the brake pad and the bottom end on the hole for the Banjo-bolt and tighten the clamp, pressing the piston into the caliper. Push it all the way in when you’re changing to new brake pads.
08/11/10 15:00:28