 with Bill Johnston
coming up that gnarly ravine, you turn the wheel just enough to clear that deep void that formed between the rocks. You give it a little gas to get over the last ledge and BAM! One of the front wheels goes powerless and you slide into the hole.
When we take our rigs out to play, things tend to break, especially after adding aggressive tires and flexy suspensions. One of the most common breaking points in the drivetrain (besides universal joints) are the birfield joints that allow us to turn the front wheels while under power. Many zook pilots have swapped running gear to beefier stock, and that works. But why not provide a way to increase the strength of what is already there? CALMINI Products Manufacturing did.
 The original designers of the birfield must have thought about strengthening their design from the start, because they put a ridge on the inner edge to keep it from exploding under great pressure. Smart.
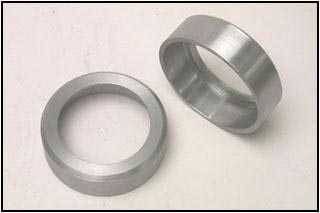 But then we pull off the 26 inch street tires and throw on some 32 inch mud tires and great pressure turns extreme. The original designers had the right idea, but didn’t go far enough. CALMINI’s* (*patent pending) Birfield Cup design strengthens the birfield to withstand this type of abuse… Here we install a set on our 92 Samurai.
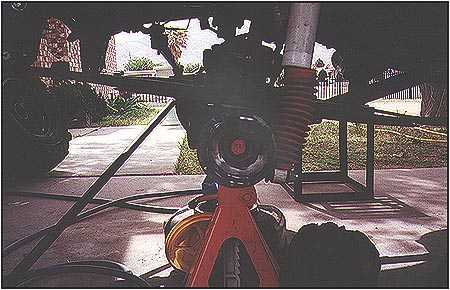
We start by placing the front axle on a pair of sturdy jack stands, and then remove the wheels and brakes. You can ‘bungee’ the brake calipers up and out of the way without loosening any brake lines, it’s quick and clean. Drain the oil from the differential and dispose of it. Next come the hubs and the ‘C’ clip that holds the axles in place. Don’t loose anything. I use a butter dish to hold all of the smaller hardware. It saves you major headaches during the reassembly.
Next remove the retainer (half) rings from the back of the knuckles. Be careful not to damage the felts under the rings, they are what keep the grime and gunk out of the knuckle.
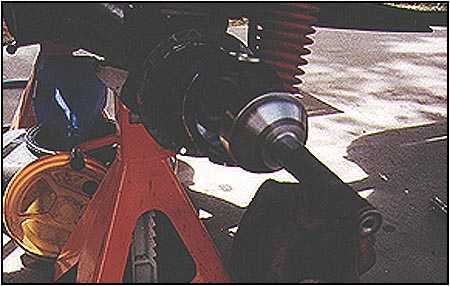
 Remove the kingpin bolts and mark the kingpins. It saves time and adjustment if you put them back the same way you found them. Once the kingpins are pulled, the knuckle and then the birfield with the axle attached can be removed easily. Then it’s time to clean-clean-clean. Get all the grease out of the axle side of the knuckle, you want a clean area to work in when you start removing material.

 CALMINI Birfield Cups are pressed on from the inside edge of the birfield to not only increase the strength, but to hold everything together. But to add this strength, you must remove the ridge left by the Suzuki engineers and machine the birfield evenly, so that the ridge becomes level with the rest of the component.

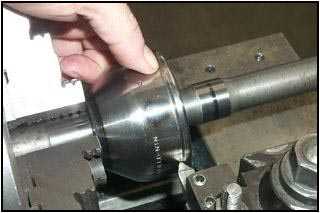
 Once the machining is completed, the cup is pressed on with significant force. We used a 20 ton press, but I think it was overkill. It could have been done with a 5 ton with no problem. Don’t try it with just a hammer and a block of wood, it may work with some seals, but don’t take a chance with your birfields.
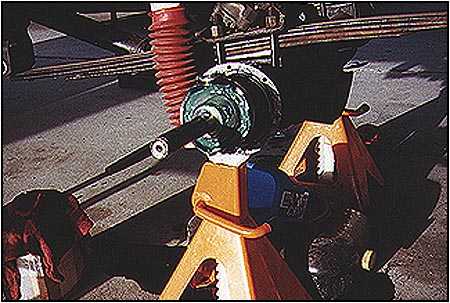
 Once you have the birfield cups pressed on, you are ready to test fit them for the first time. The axles will slide in and seat with no trouble, but remember this is a front axle the axle stub must move forward and back freely in order to turn the vehicle. Looking into the axle housing side of the knuckle you will notice the upper and lower build up of surface area.
  As you test fit the newly equipped axle, move the outer stub forward and back and you will notice the contact points where you will have to remove material. I first attempted to remove the material using a carbide burr but it took almost 2 hours to finish a quarter of the work on one side. This wasn’t working.
 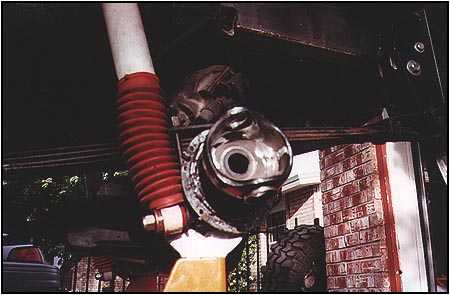 I looked up at my tool shelf and I noticed that the blade on the 3.5″ cutoff saw was about the same size as the birfield I figured I would use the saw to ‘grind’ out the intended pathway needed for the upgraded birfield. It worked like a charm! It took about five minutes to finish up the drivers side and another ten minutes to do the passenger side.
 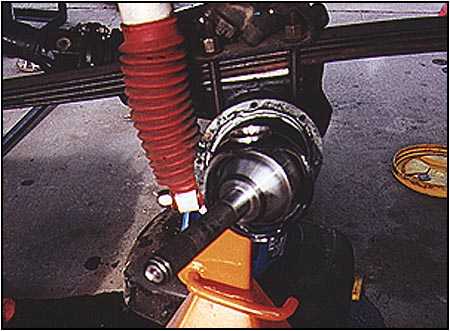 Be careful to only remove what is needed to allow full movement of the upgraded birfield. It is easy to get carried away with the removal process. The secret is to check the fit often. Make sure you replace the rag in the axle housing before cutting again though, you don’t want any metal grindings to find it’s way into the axle housing.
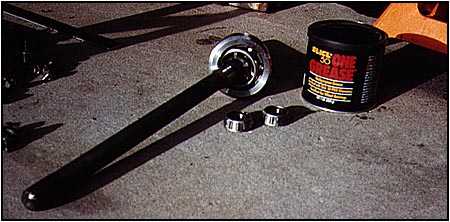
 Once enough material is removed to allow full range of motion, all of the grinding residue must be cleaned up . Next, all of the components must be repacked with fresh grease and reassembled. Don’t forget the ‘C’ clip on the outer axle stub when replacing the hub. Fill the differential to the proper level with gear oil.

 Taking the zook through the rubble field after the installation put the steering through it’s paces. I made sure I still had the full turning radius while taking it through the rocks. Listen for metal on metal or grinding noises and check the hub knuckle for excessive heat. Too much heat means trouble. If it gets too hot, pull it apart and find out where the contact is and grind it down. Otherwise, take the zook out and have some fun.
Source:
CALMINI Products, Inc 6951 McDivitt Dr Bakersfield Ca 93313 Toll free order line: (800) 345-3305 Fax: (661)398-9555 Web Site: http://www.calmini.com
08/11/10 15:14